In the context of Custobar, Audiences mean a segment of your customers, built from queries and filters, that is saved as a block that can be used for campaigns, reporting and segmenting repeatedly.
To view, select or create a new audience, use the drop-down from the customer thumbnail, and either click on Audiences to access your folders or click on Customers to go on the customer page of your Custobar account. To see the changes to the page and go over the details, please refer to this article.
-
Creating a new audience
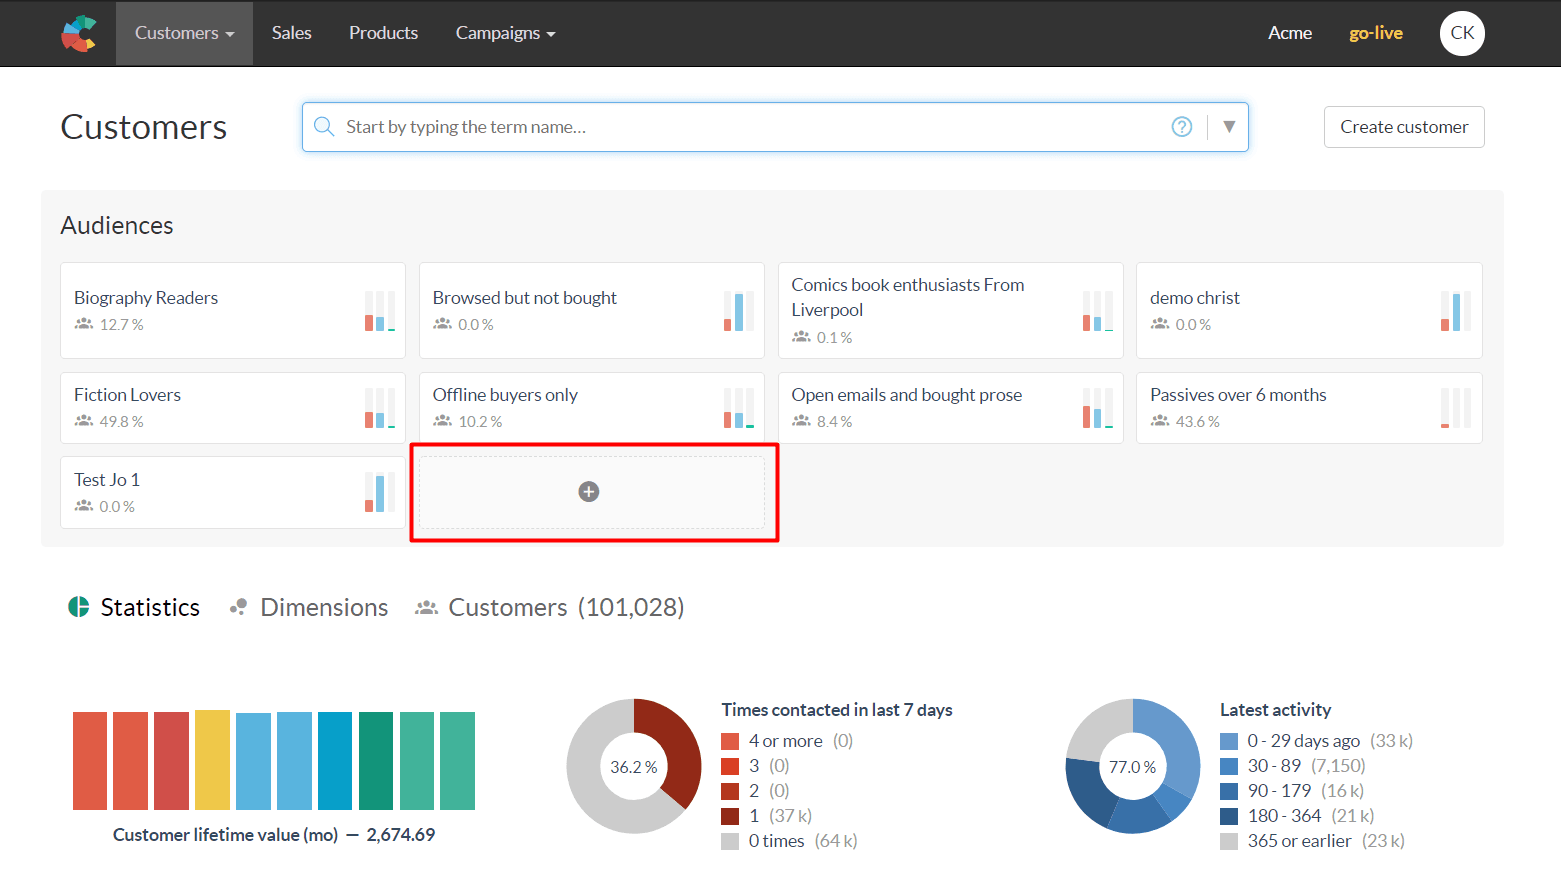
To create a new audience, you need to go to the customer page and click the + sign in the Audiences section.
This redirects you to the audience creation page. This is where you will define which queries or filters you will add up to segment your customers. The search bar allows you to search for the field of your choice (example city). Once the field is selected, type a value (example Liv) and suggestions will appears (example Liverpool).
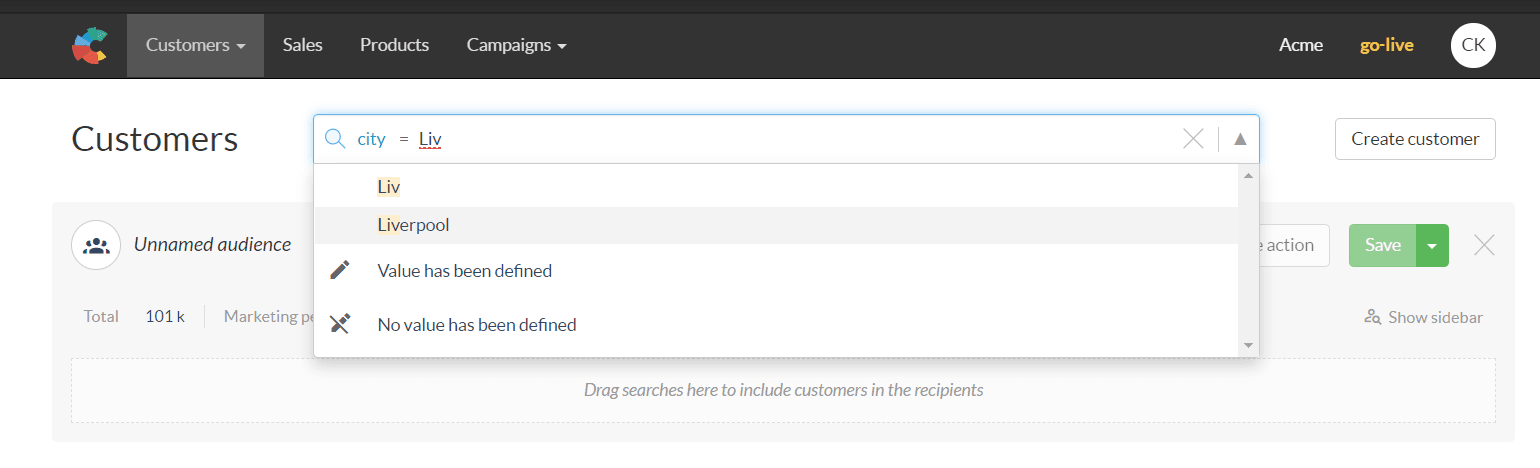
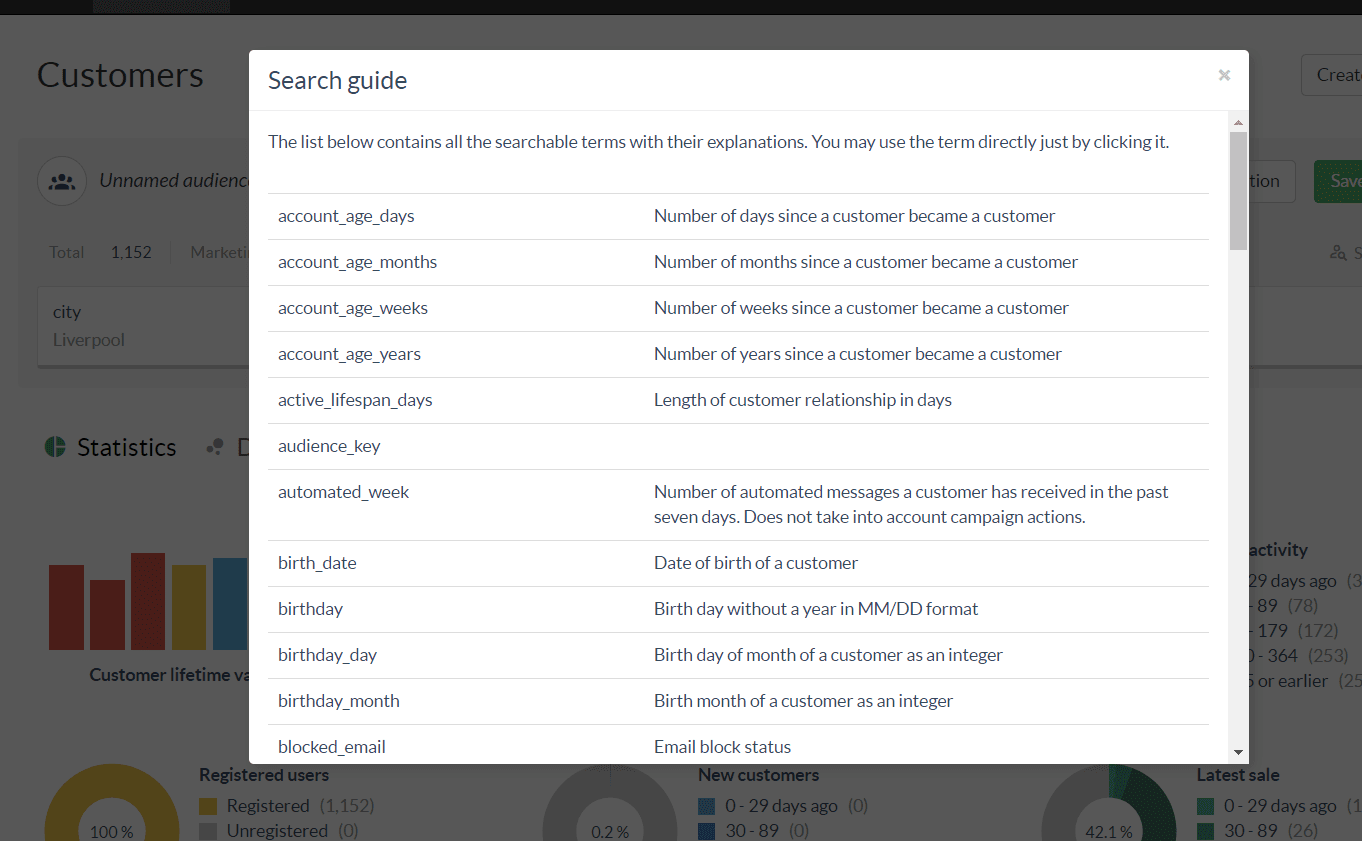
Click on the value you want to filter for and it will be applied to the audience. Please note: To find a Search guide listing of all the existing fields you can search for, click on the question mark symbol and you will see a list pop up with all the fields and their short description. Click on any field to add it to the search bar so you can start typing a value.
You can also use "Search cards" to segment customers based on the most commonly searched attributes. To see the existing search cards, click the arrow down on the right hand side of the search bar.
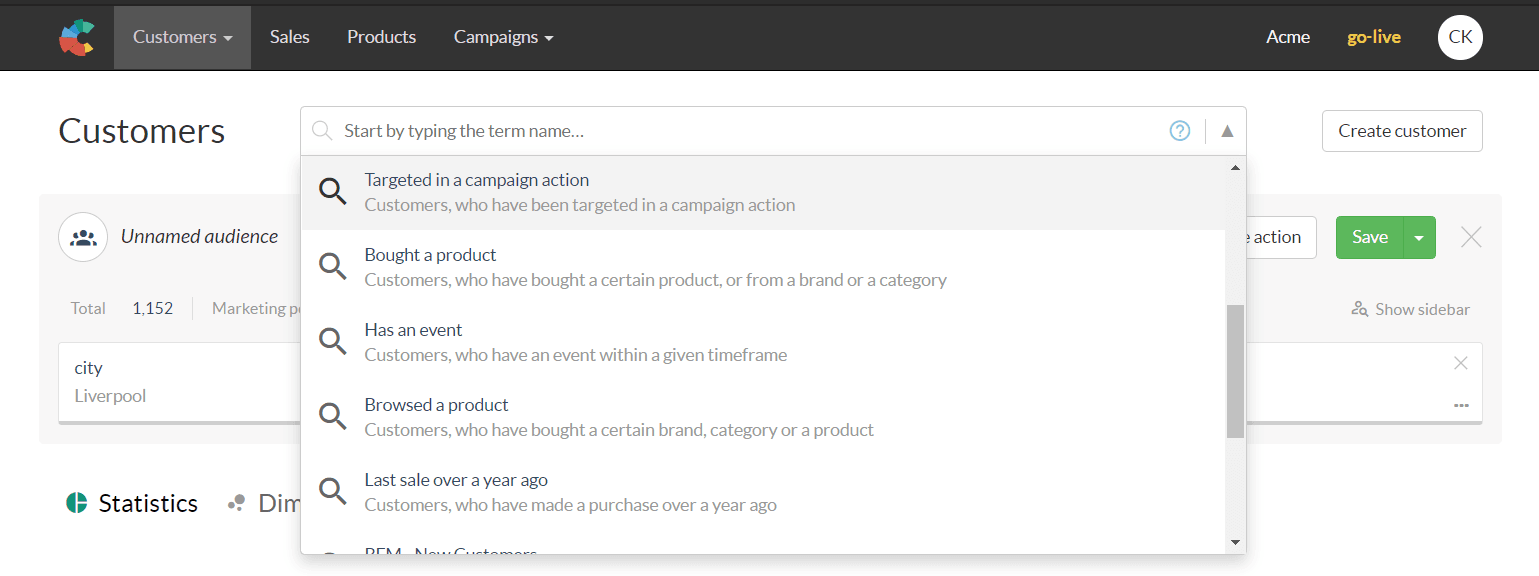
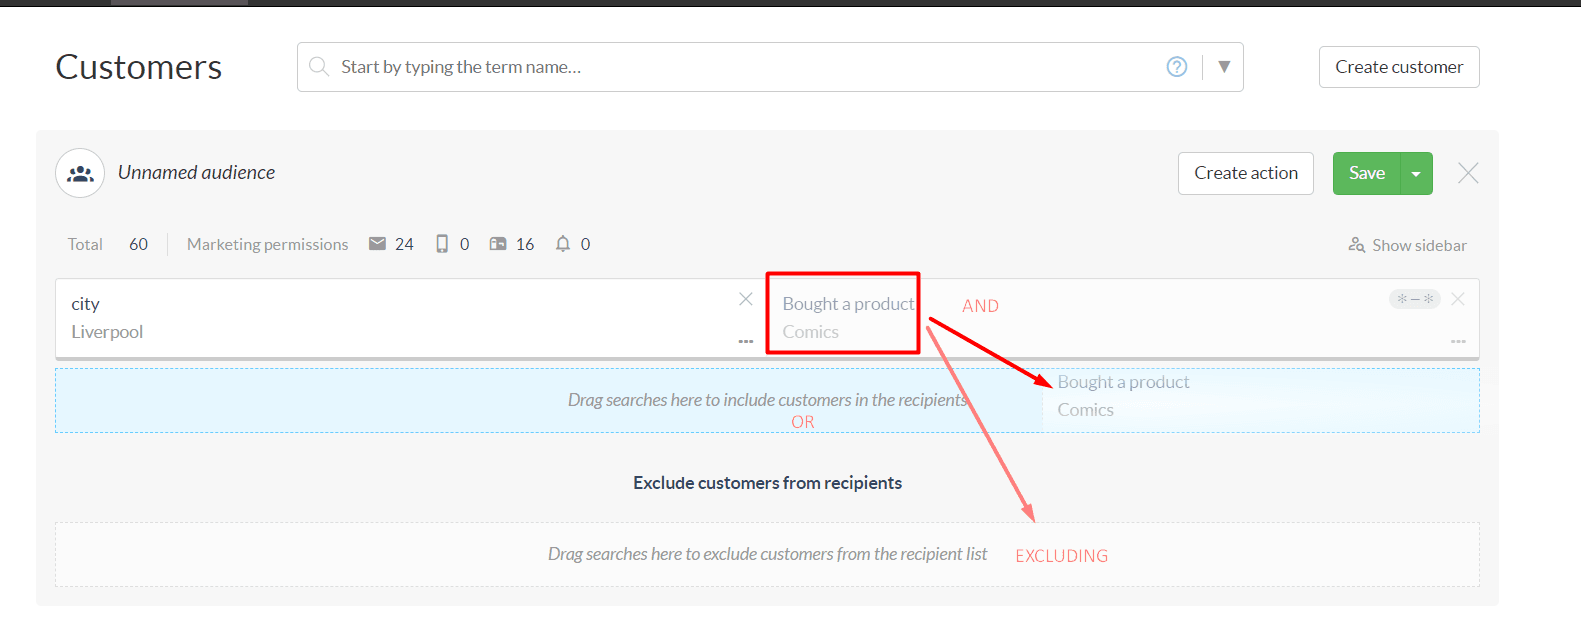
For example, All sales related fields can be found under "Bought a product". Click this card and you will see all the fields grouped together. You can then filter values by typing in each of the fields based on your needs. For example, customers who bought Comic books category can be filtered by typing "Comics" in the field "sale.products.category" and clicking "Add" when finished.

In this example, we have now two filters which we can apply either side by side ("AND" search), or one under another ("OR" search) or finally, we can use one of the filters for exclusion by dragging it at the bottom ("EXCLUDING" search).
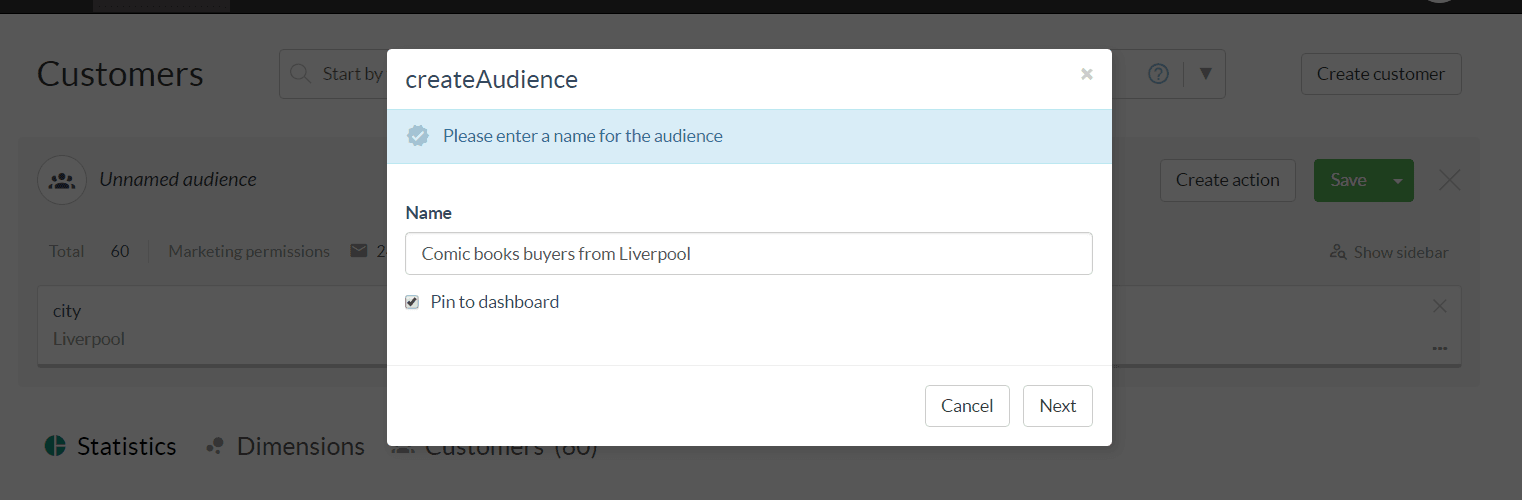
We can then save our audience to name it and we can pin it to the Dashboard. Our saved audience can be used in future campaigns and pinning it to the Dashboard allows us quick reporting.
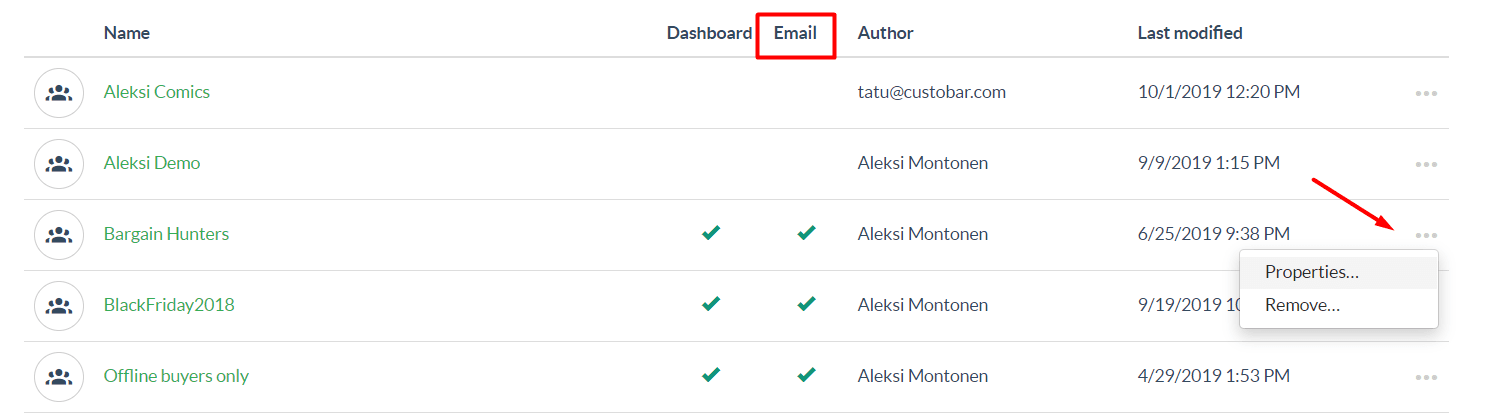
Since audiences can also be used in conjunction with the module visibility feature, you can choose to have the audience show in the email editor's list by editing the properties and ticking the relevant box.
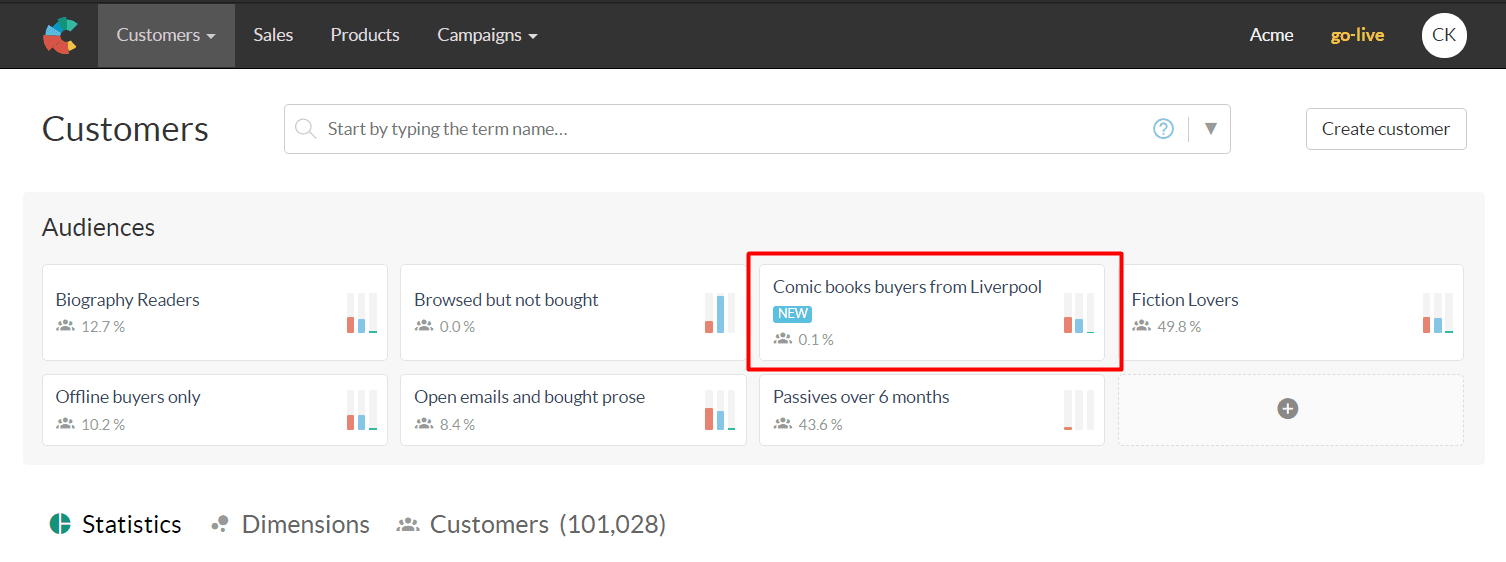
Our freshly saved audience can now be placed in the target folder of your choice or in a new folder. It will also be visible in the customer page with a NEW tag.
- Creating a new audience based on existing audiences
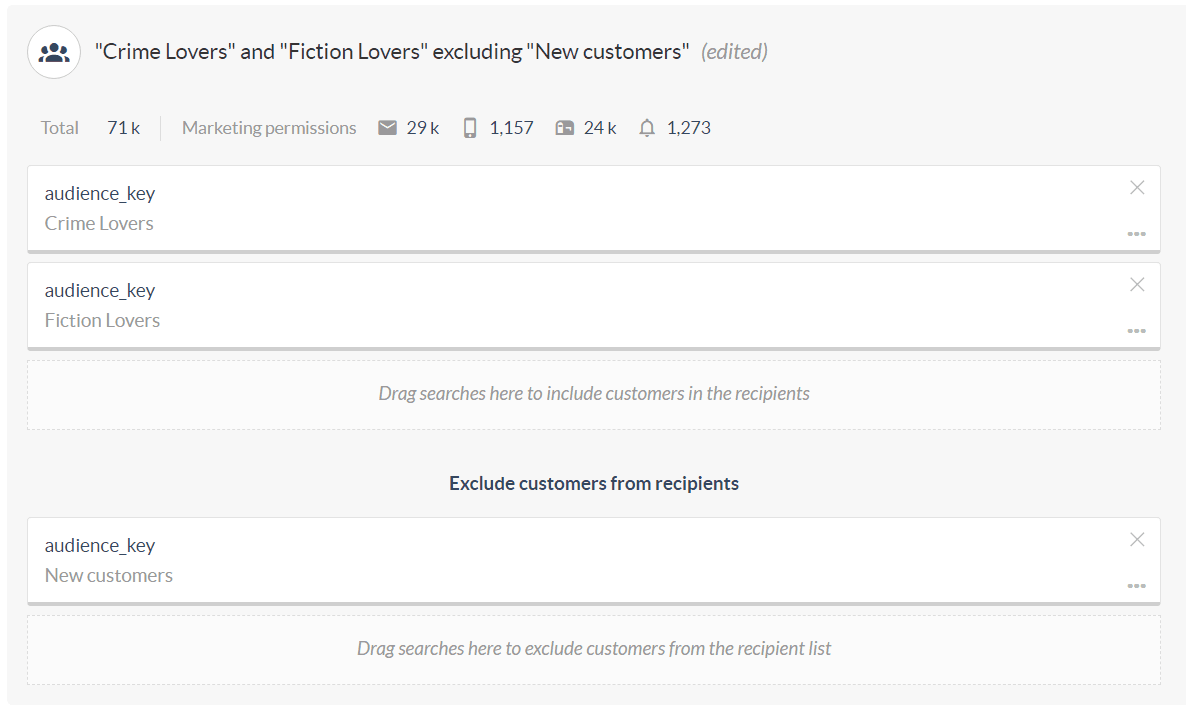
In Custobar, you also can include and exclude customers from existing audiences and combine them into new audiences. This is done by using “audience_key” in the search.
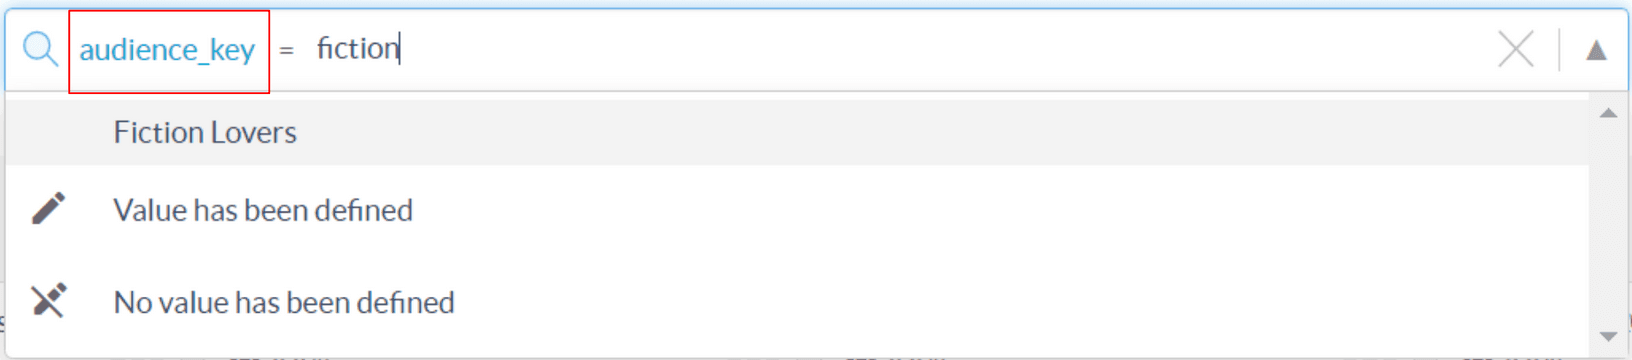
Audience key can be useful, for example, if you want to include customers from specific audiences but exclude customers who also belong to a third audience. The example below shows an audience that consists of customers from both Fiction Lovers and Crime Lovers. However, any new customers are excluded from this audience.
- Using audience in a campaign
a. creating a new campaign from an audience
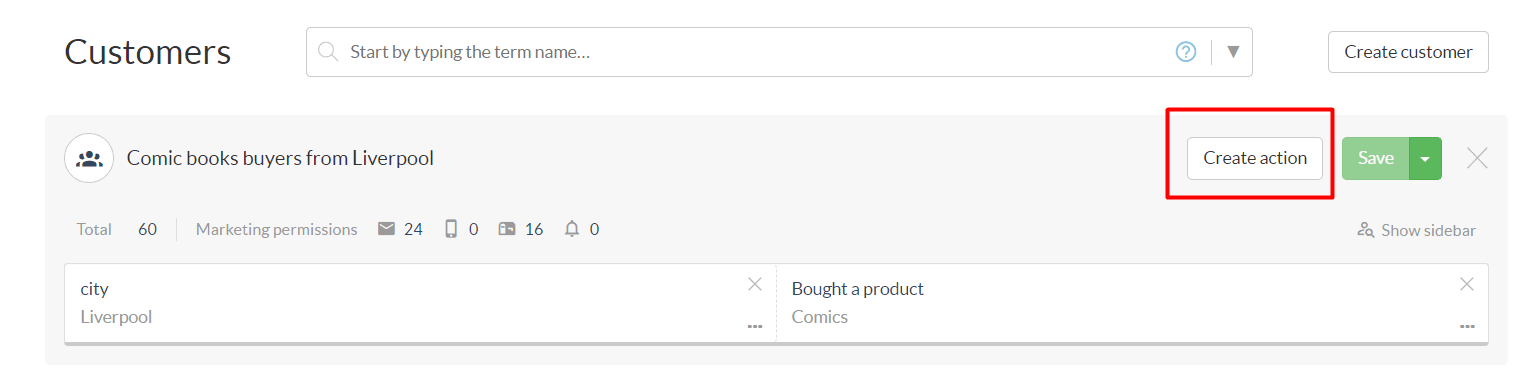
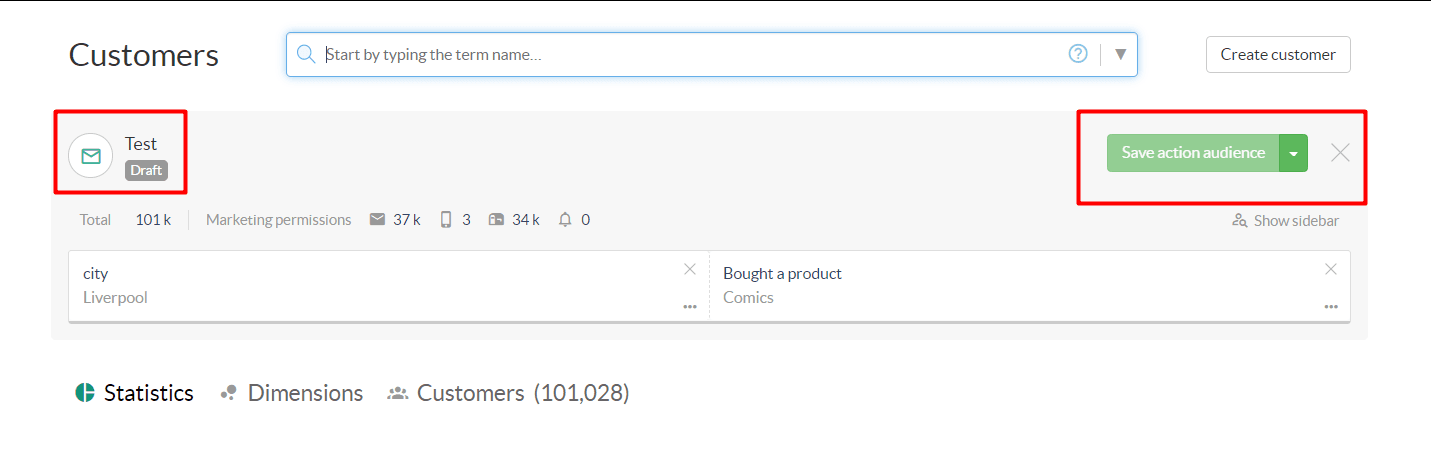
There are several ways to create a new campaign using a saved audience. You can click the audience from your audience folder or the customer page and click "create action".
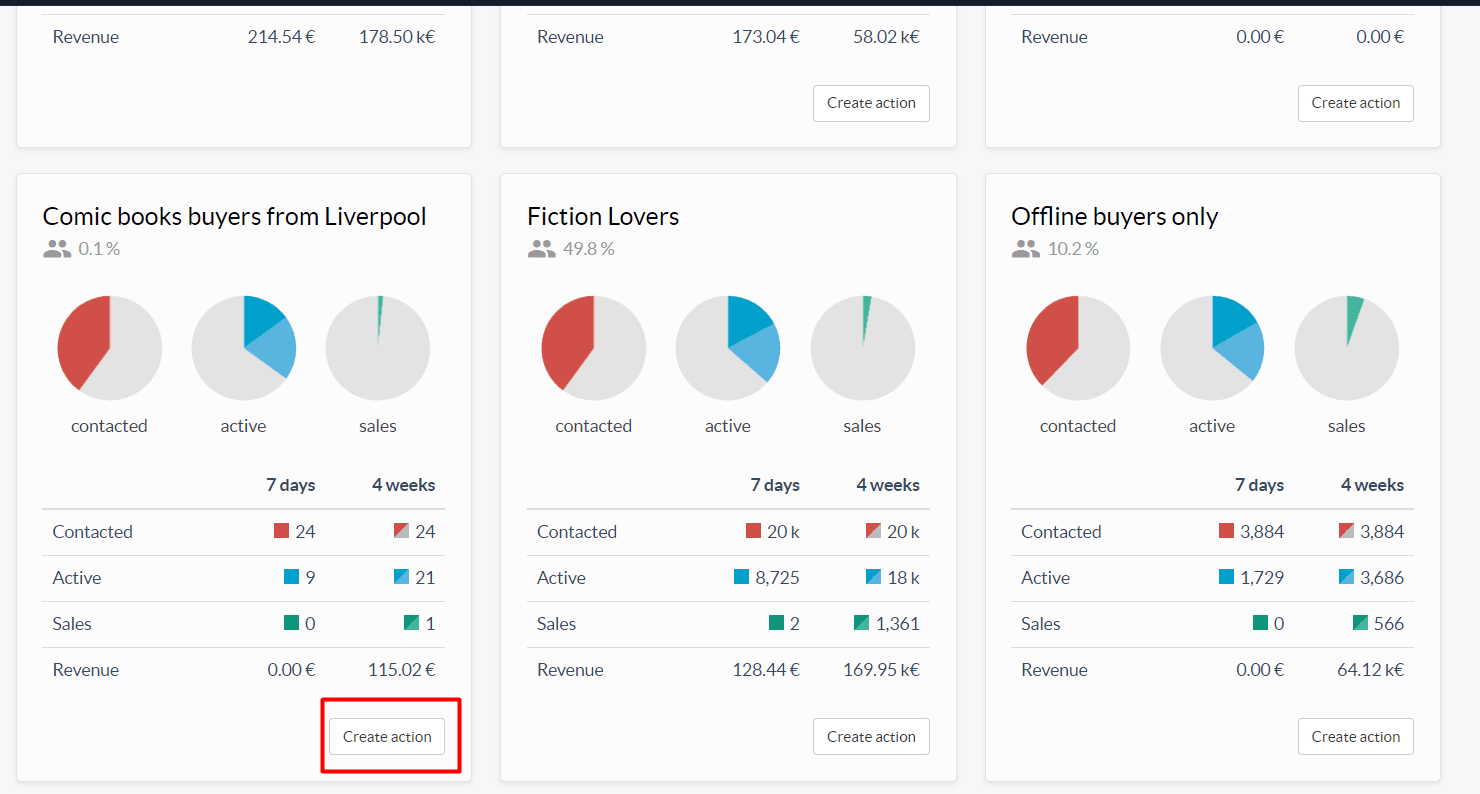
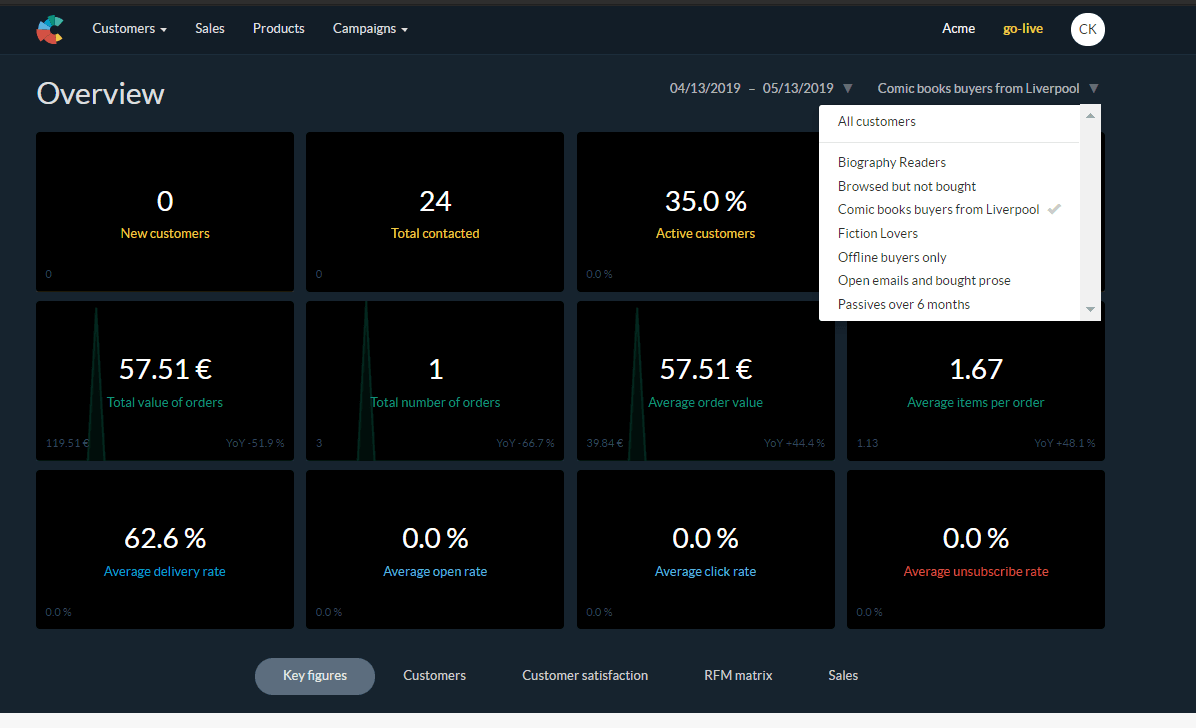
Or you can use the dashboard to launch a campaign quickly, which can be useful for targeting key audiences regularly.
Once you have clicked Create action, choose a type of campaign, give it a Title, choose the target folder to store the campaign and decide whether you want to start from scratch or copy an existing campaign's content. You will be redirected to the content editor for the campaign. Please note: Since the campaigns are now created with a saved target audience, you do not need to reproduce that segmenting when creating the campaign. The audience can be used as many times as you want which is both a time saver, and useful for reporting as you can track the evolution of key metrics for that same audience over time.
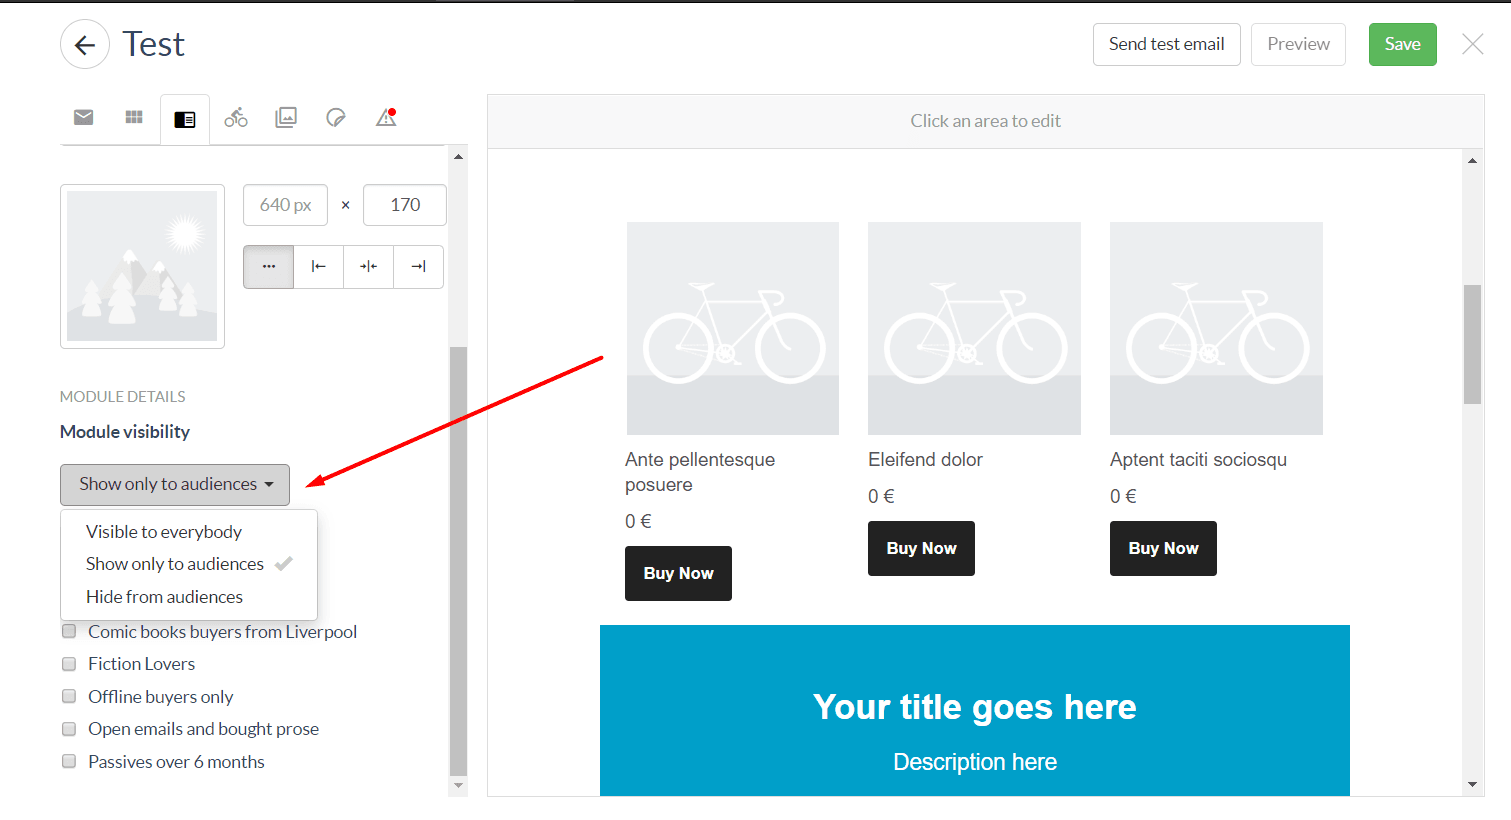
b. module visibility
When editing the content for the campaign, you can select any of the modules you have added to the content and define its visibility. The module can be Visible to everybody, or it can be shown/hidden to specific audiences. Just select the option you need and tick which audience this applies to. Please note: Since the campaign is targeting an audience (Comic books buyers from Liverpool in our case), ticking other audiences means selecting the customers who belong to both audiences, ie. overlapping segments.
c. content and activation
Saving the content will take you to the next page where you can define the moment of sending, filter our customers who were contacted X times or more over the last 7 days using the cursor, throttling the bundles of 1000 emails or how long you want to track the sales for this campaign.
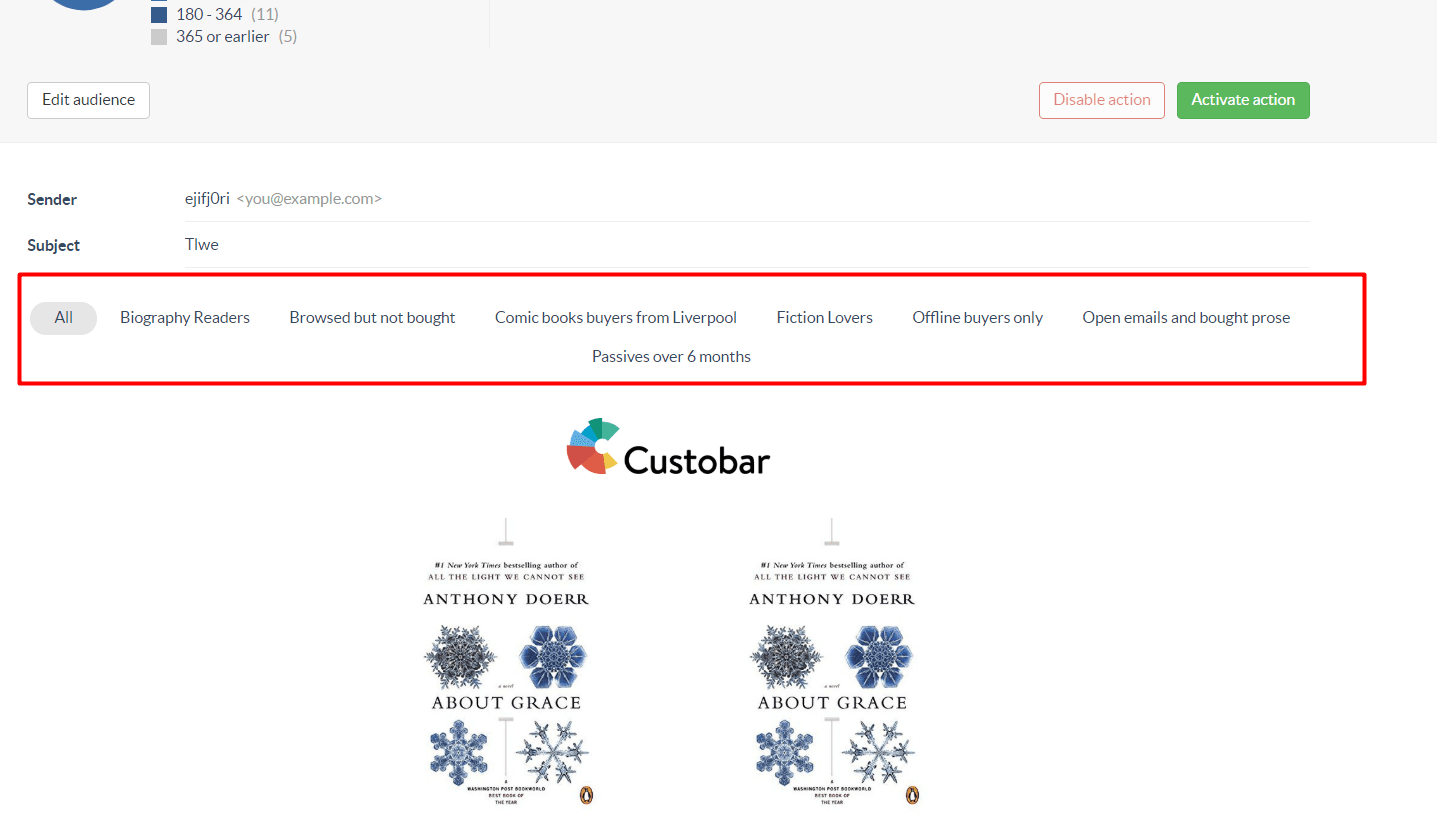
Scrolling down will take you to the preview of the campaign content. You can select different audiences to preview what the campaign will look like depending on the Visibility feature and modules you have set up for each saved audiences in the content editing section.
When you are all set, go ahead and activate the action.
d. editing an audience
If you wish to edit the content or the audience itself, go ahead and click the relevant button.
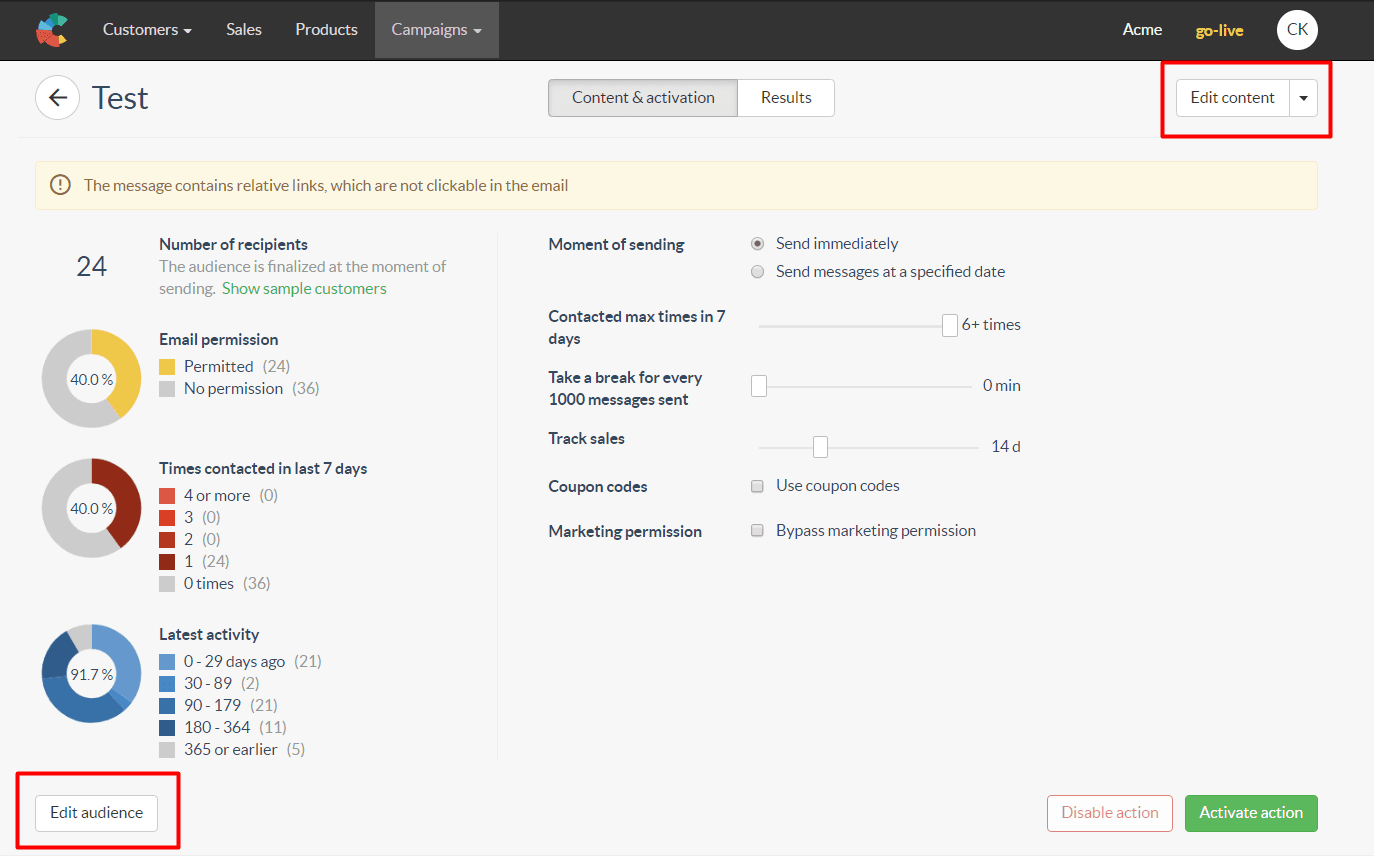
You will be redirected to the content editor, or the audience page. There, you can see that the draft you were working on is visible. Click on it to return to the content and activation page or start editing your audience and save it.
Note! Make sure to Save your changes to return to the content and activation page with the changes you made. simply clicking the draft will return without saving the modifications.
-
audiences in the dashboard
Pinning the audience to the Dashboard when saving it make the audience visible under your Dashboard for quick reporting with important metrics and the audiences can be contacted easily by using the Create action button.
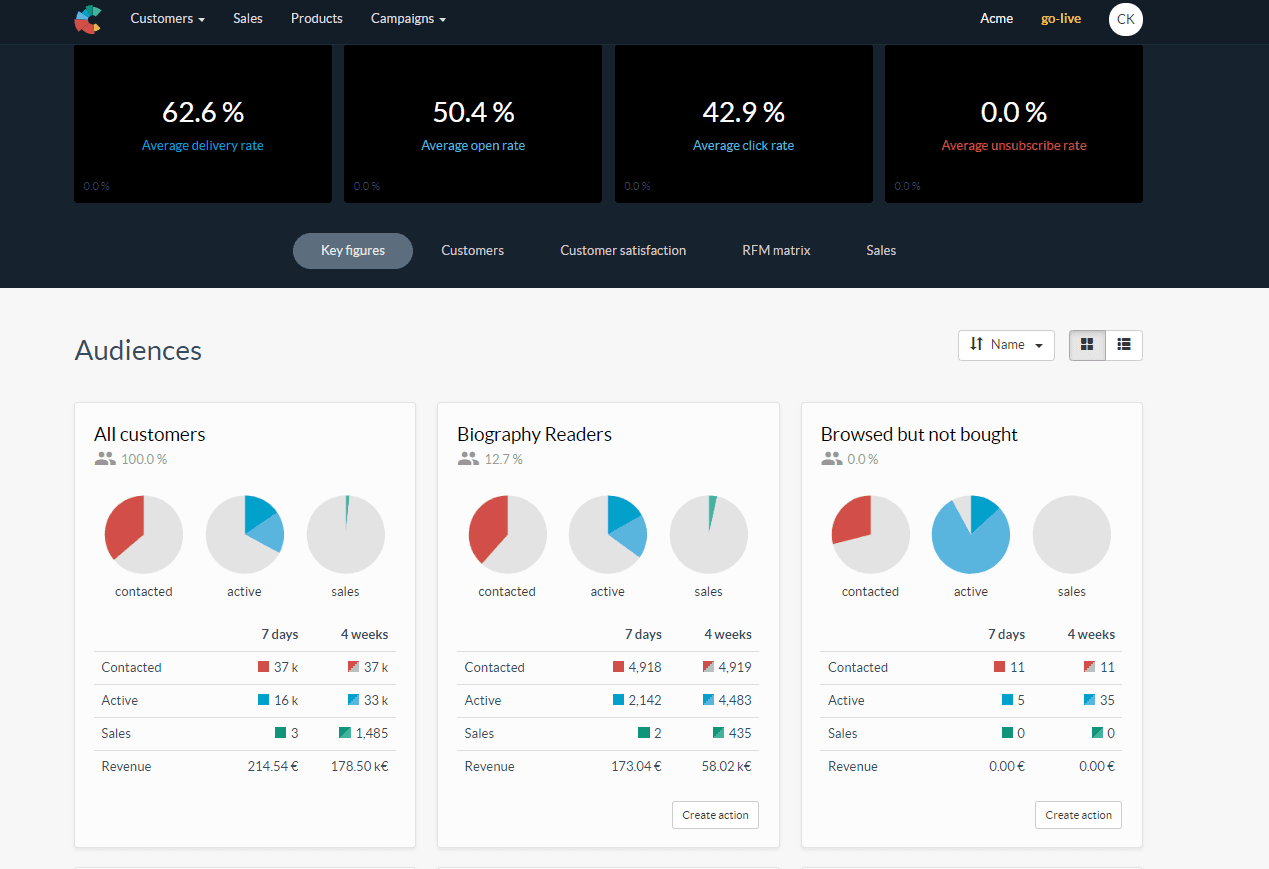
A pinned audience can also be used to see a narrow segment in the Dashboard.
As well as using the RFM matrix to further break down the segment and contact the customers within the audience based on their RFM matrix position.
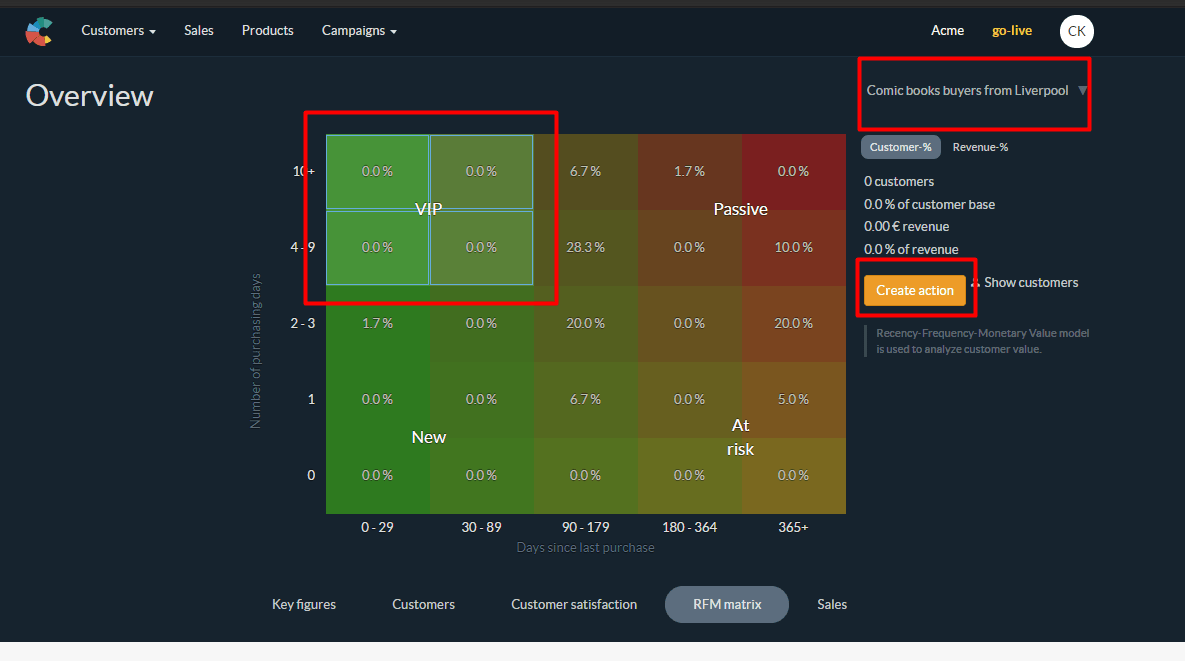
This provides you with a great tool for narrow segmentation, recurring campaigns for important customers groups and quick access to specific customers segments for marketing campaign tailored with surgical precision!
If you have any questions or concerns, please contact Custobar support.