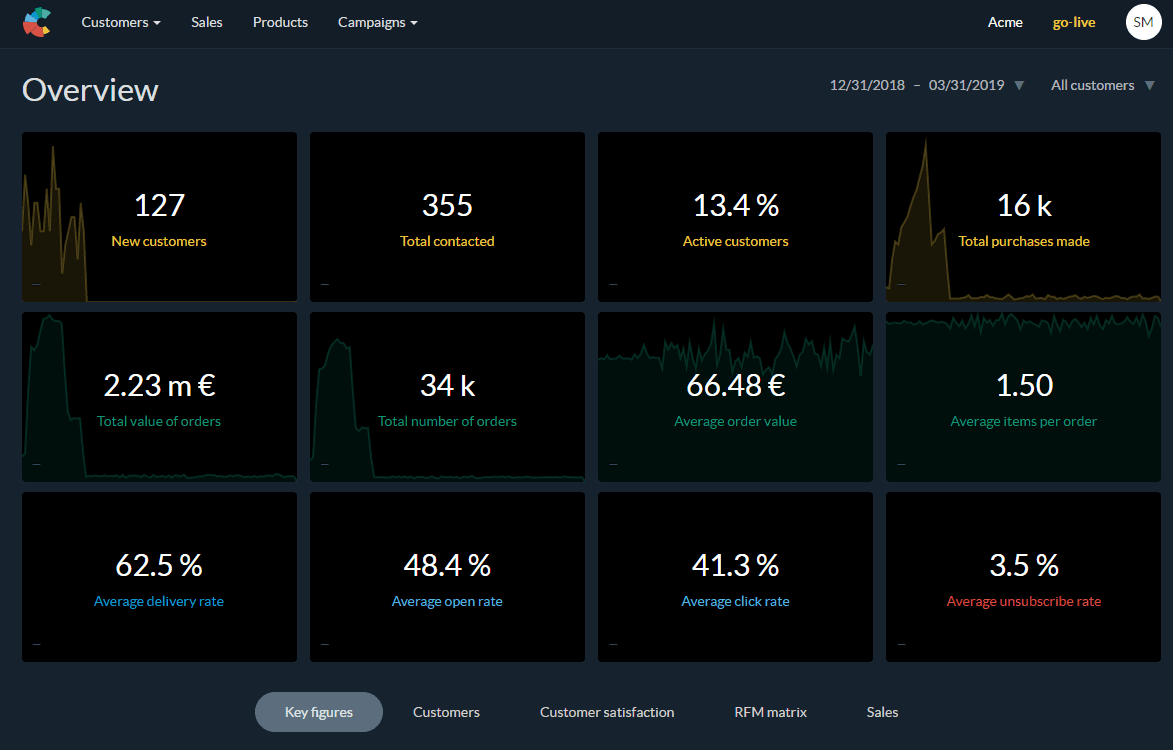
The Overview
Here you can now see different keypoints according to the chosen audience. By default its calculated by ALL your customers in Custobar.
The Campaign page
This is where you can find all your campaigns as well as the general statistics for all campaigns sent in the chosen time window seen on the upper right corner.
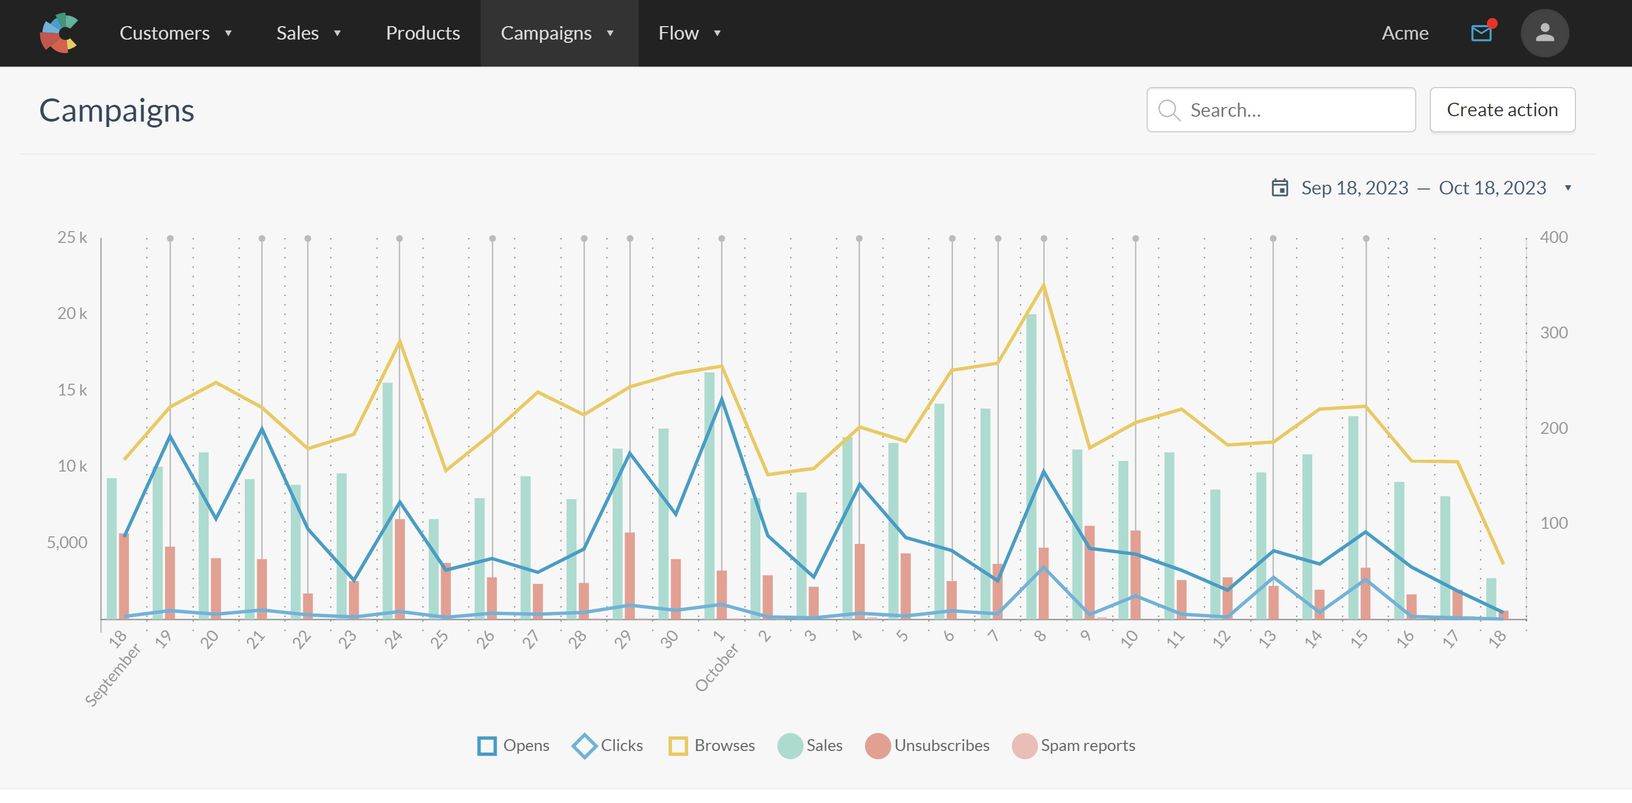
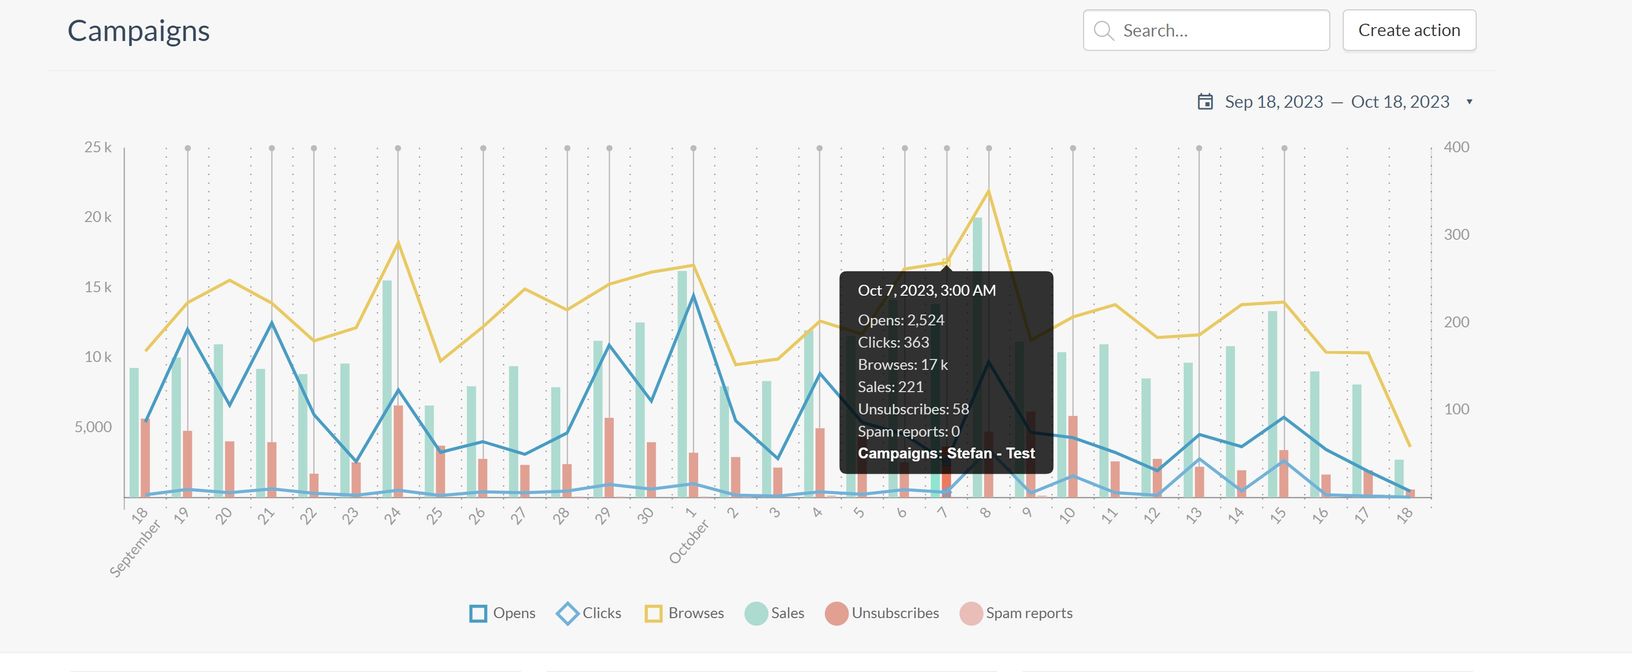
In the background of the general graph, you can see your past campaigns as ticks for each day a campaign was sent. Hovering over a single day will give you more information about the numbers for the KPIs as well as which campaign was sent. Using this type of entries allows showing more than one campaign if several were sent on the same day.
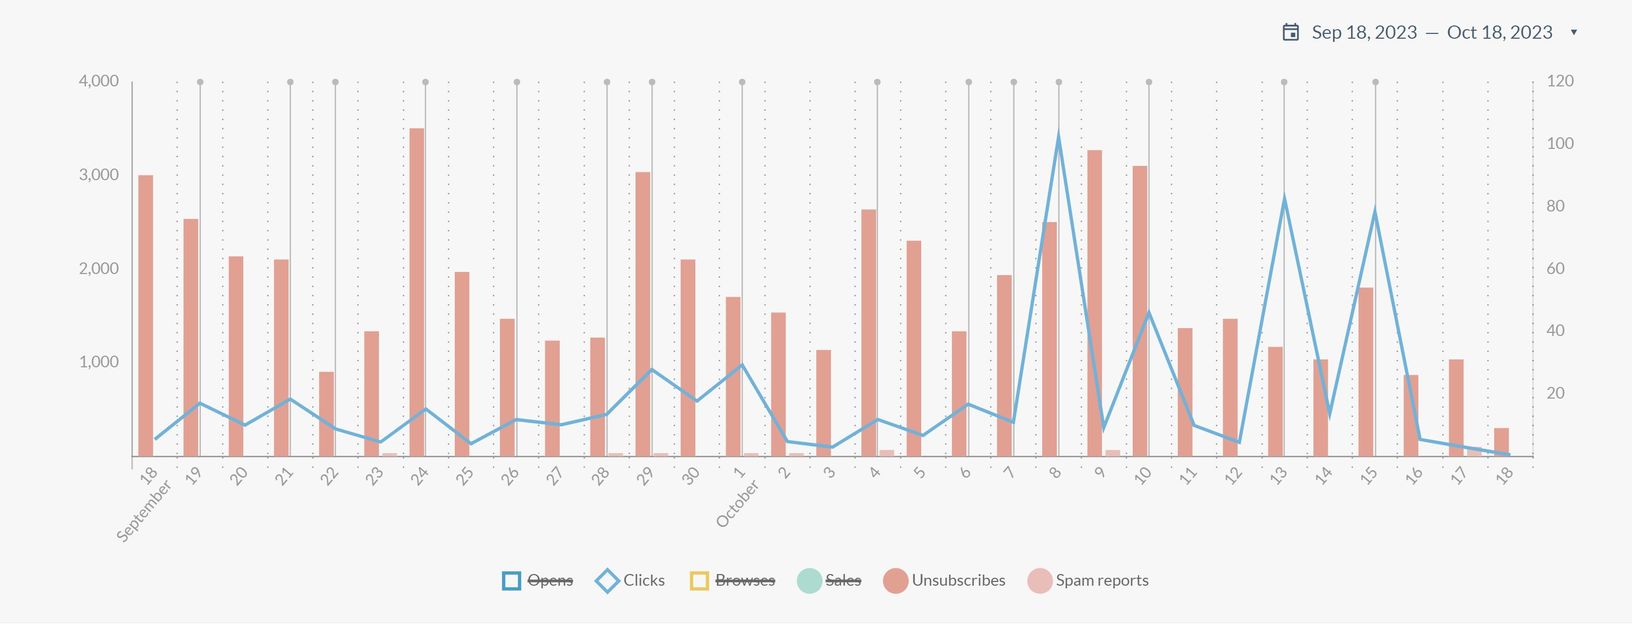
Please note: the graph includes two axis. Some KPIs are numbered in the thousands for example Opens or Sales
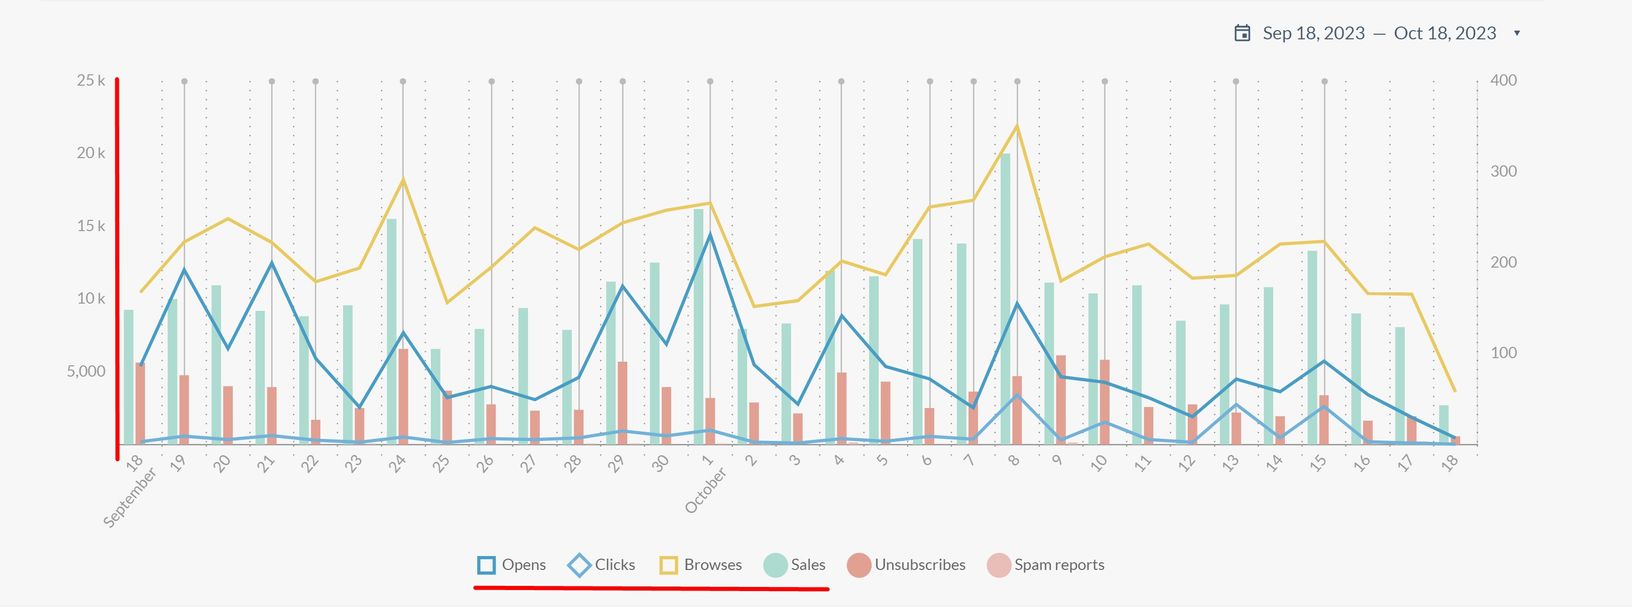
while other are numbered in single digits such as Unsubscribes or Spam reports.
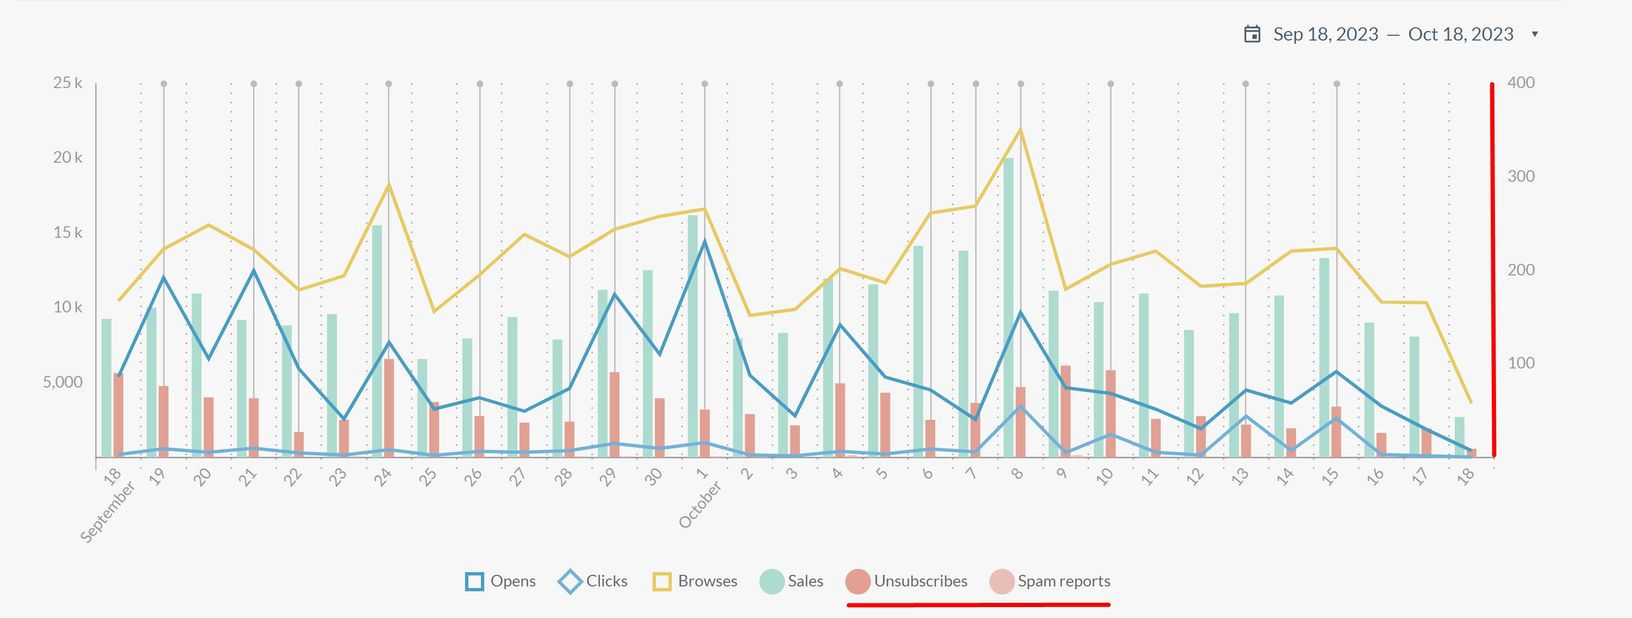
And you can show or hide the relevant KPIs from the graph by clicking on them, which will automatically adjust the scale of the chart to best accomodate the KPIs that remain.
As you can see, this is where you will create, organize and compare all your Actions. What’s more, the Actions are all visible in the section below, as well as their current status:
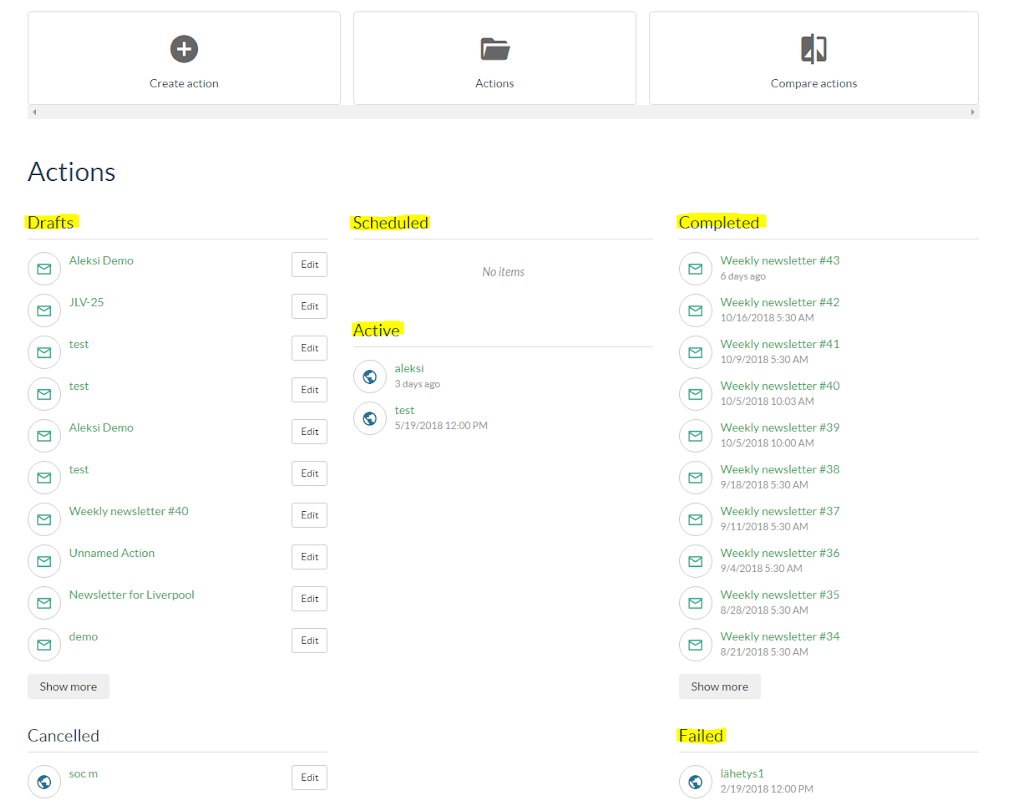
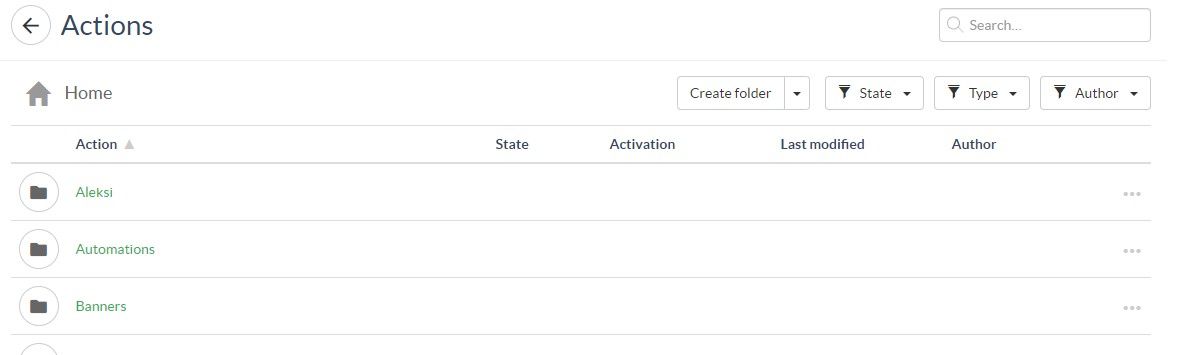
The folders
The UI has been designed to allow easy and quick organization of all the actions. They can be arranged in folders using a simple drag and drop motion which allows you to organize and structure your campaigns in the most efficient way for you. To create a new folder, just hit the button and use your mouse to move it where you need it. If an action or a folder is inside a folder and you want to take it out, just click and drag it to the folder picture in the upper left as shown by the red arrow:
Creating a new action
We will now look into how to create a new Action:
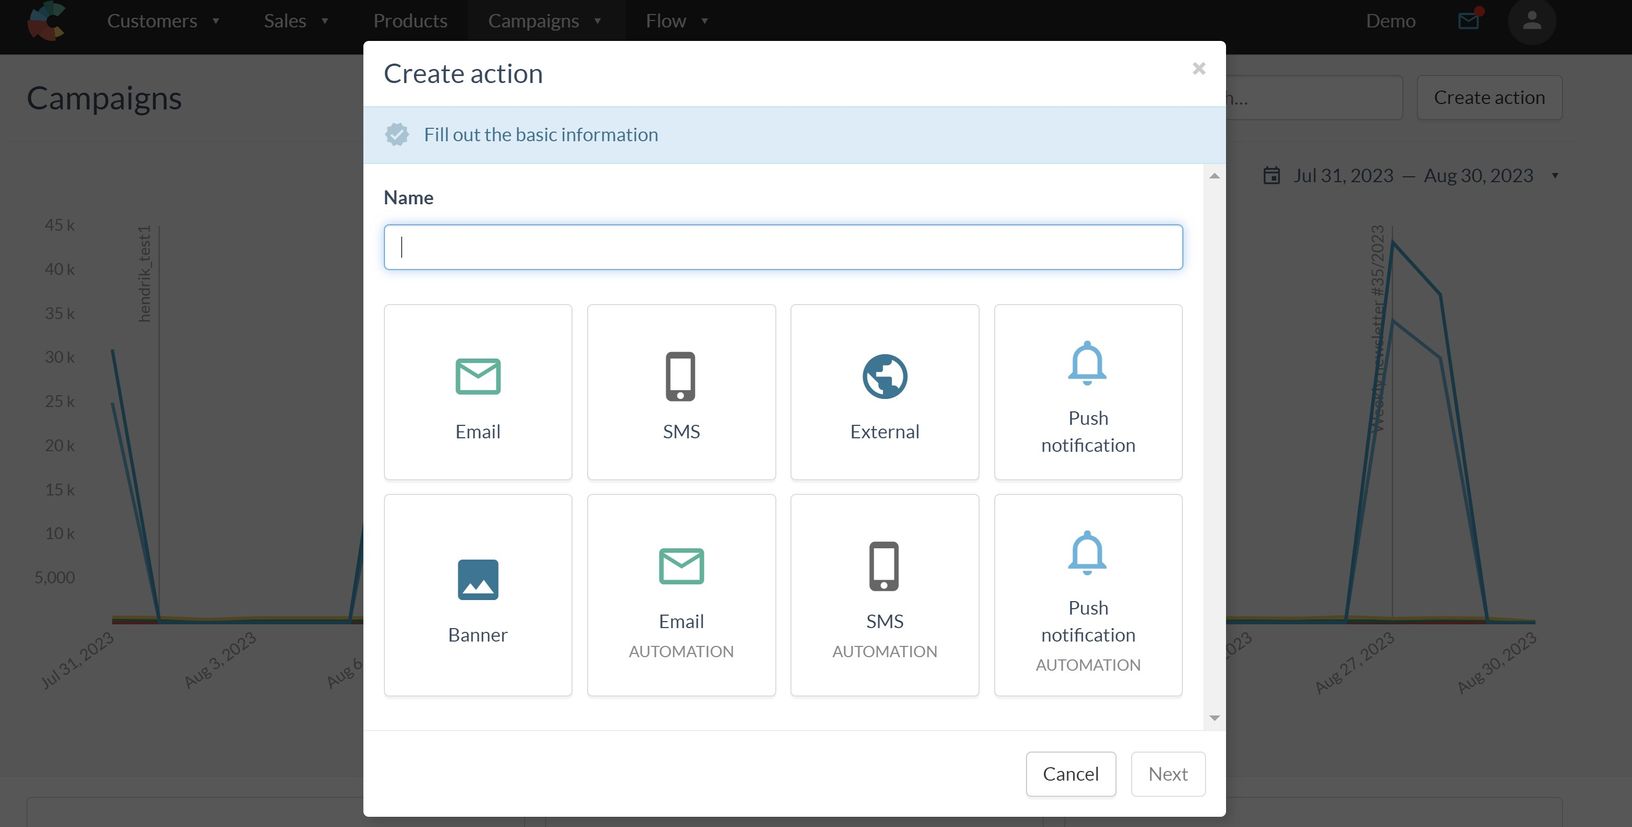
The first step is to hit Create action. A new window opens:
This is where we will name the action and choose a type:
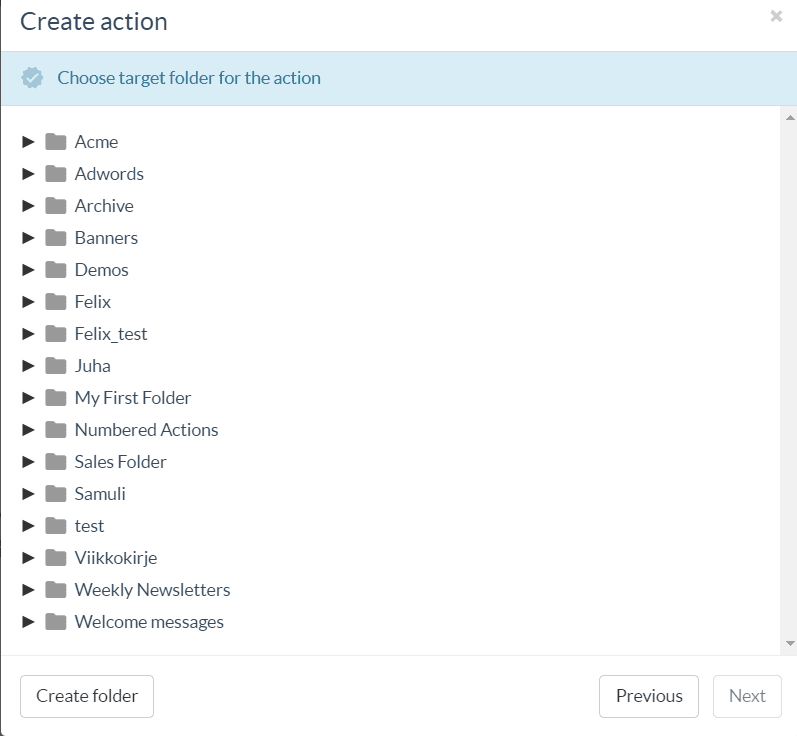
Next, we are prompted to choose a folder for the action.. In our example, we created a Weekly Newsletter folder, which we will now pick for this New action we are creating.
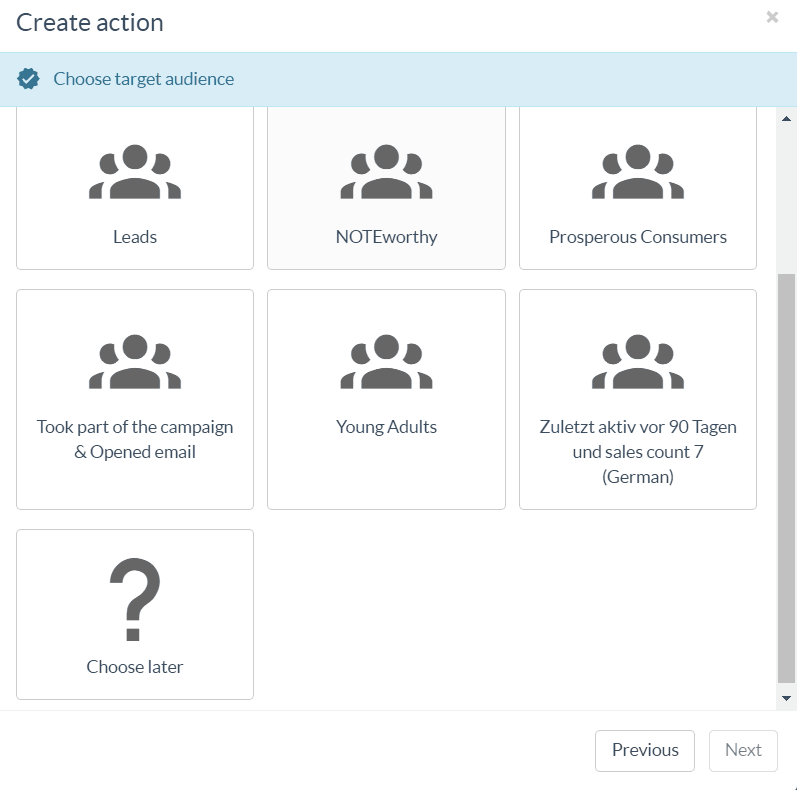
Next, we will decide if we would like to use one of the audiences we have saved, or choose the audience for the campaign later:
Then, we will decide whether we want to create a message from scratch, or copy an existing one.
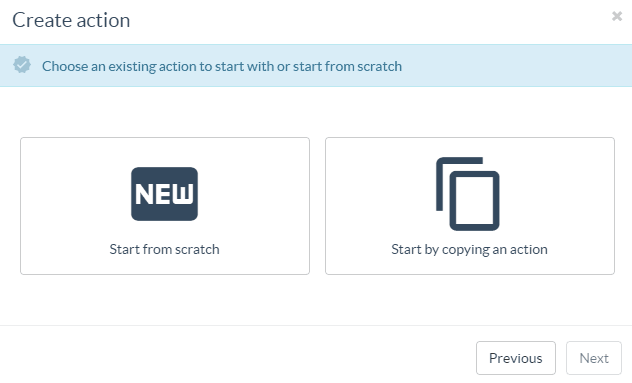
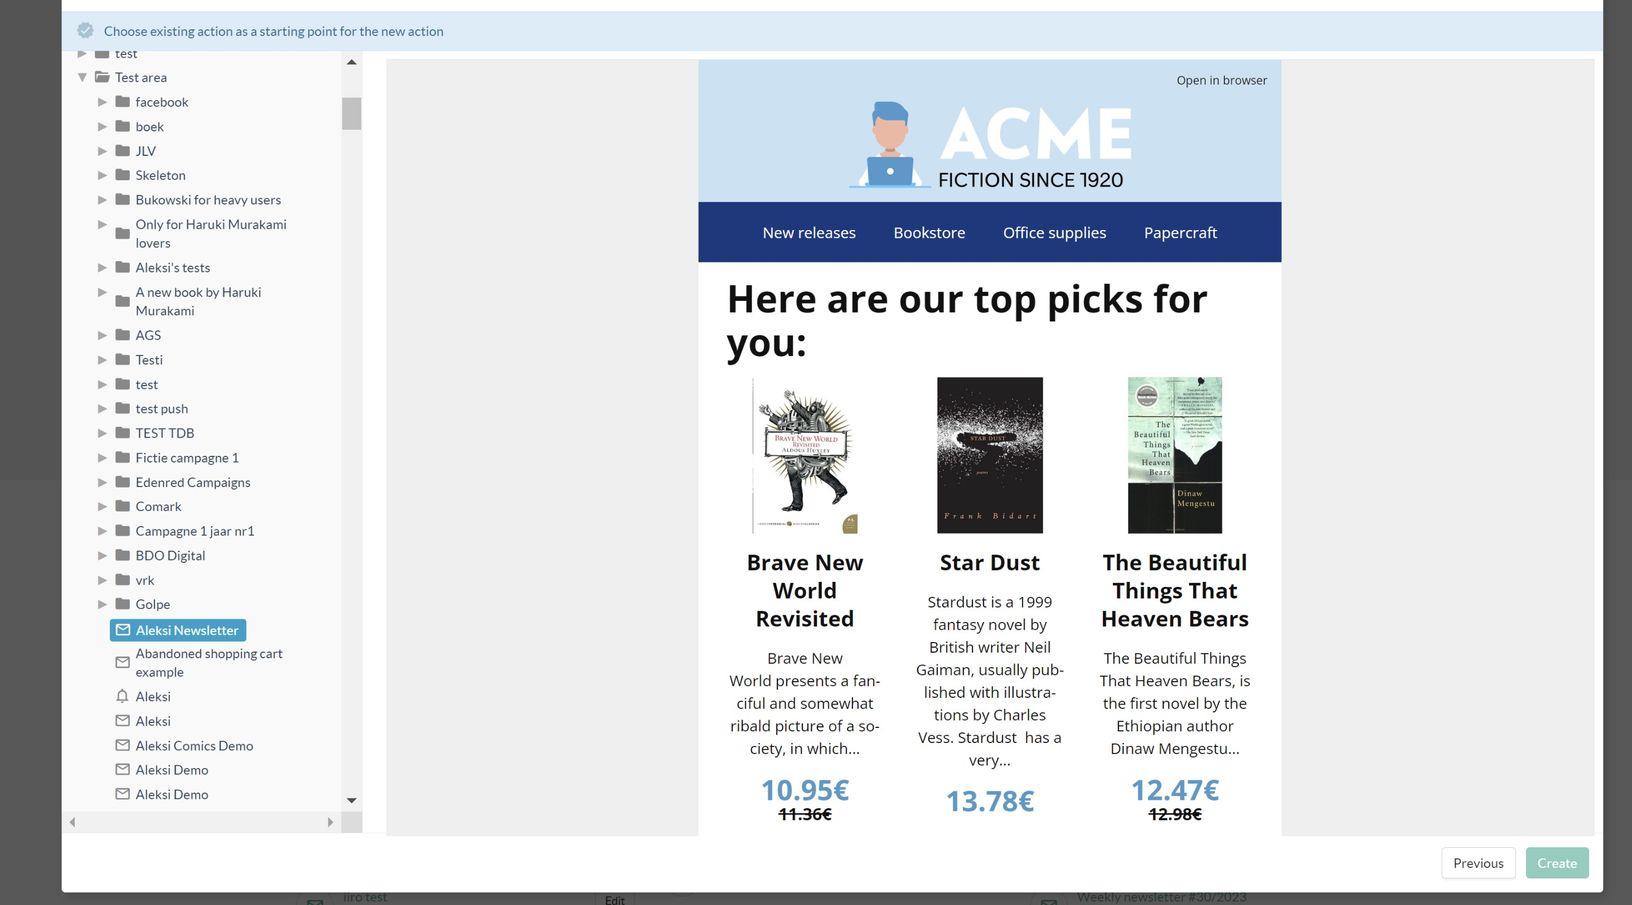
We choose to copy an existing one, which will prompt a window to define which message we will copy. Again, the folder system allows us to easily find the message we want and when we are ready, we can hit the Create button!
From this point on, we have three steps to finalize the Action:
- Build the message
- Define the Audience if you chose to define later
- Define the Delivery settings.
You will be taken to the content view to review and edit the content of the message, using modules and pictures Drag-and-Drop and simple text editing. In the example, I already copied the message from a previous action, if you would have chosen to start from scratch you would now have a empty template to build using the modules.
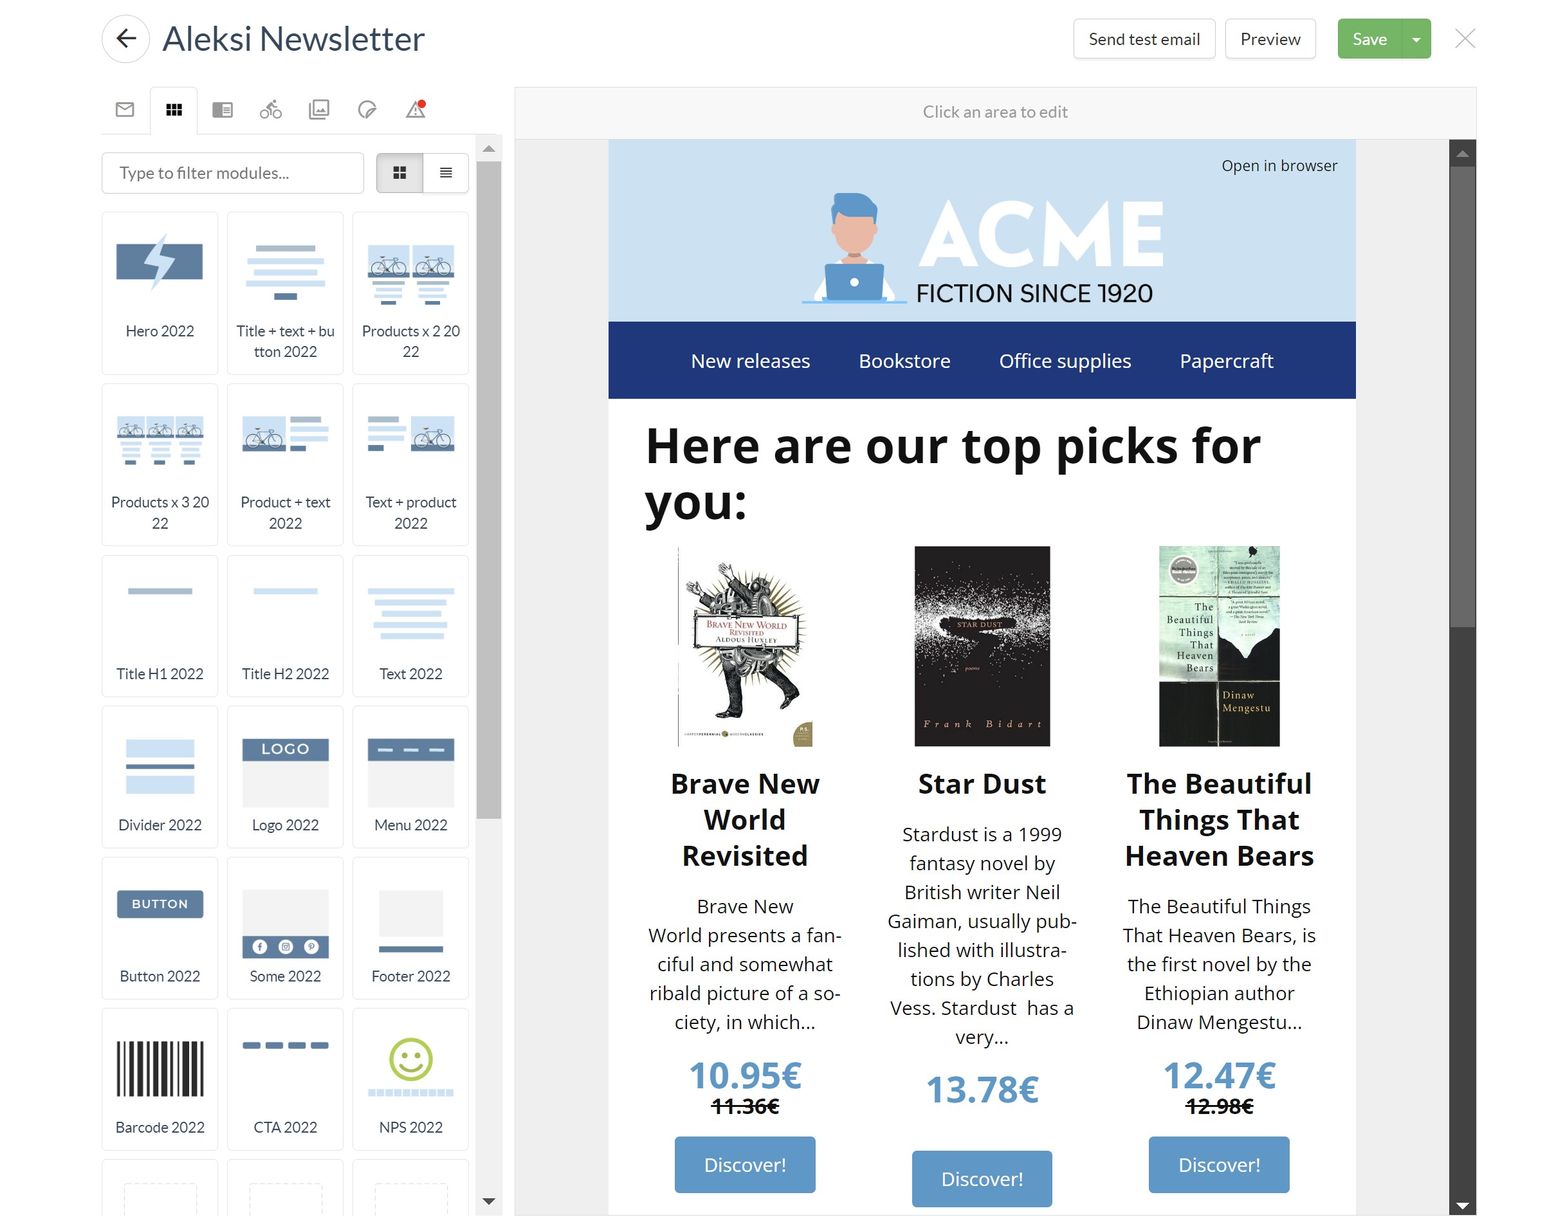
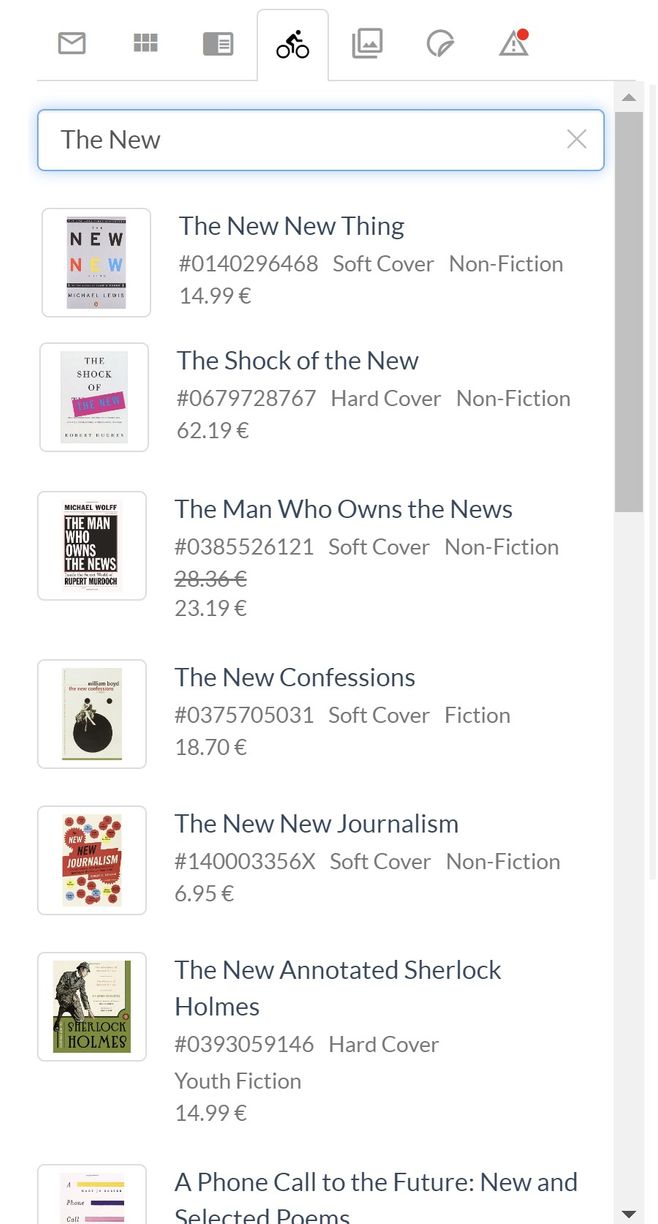
The Drag-and-Drop does not only apply to the modules that build the content, it is also the method used to fill-in the products you want to showcase in your email. Regarding the products, several options are available:
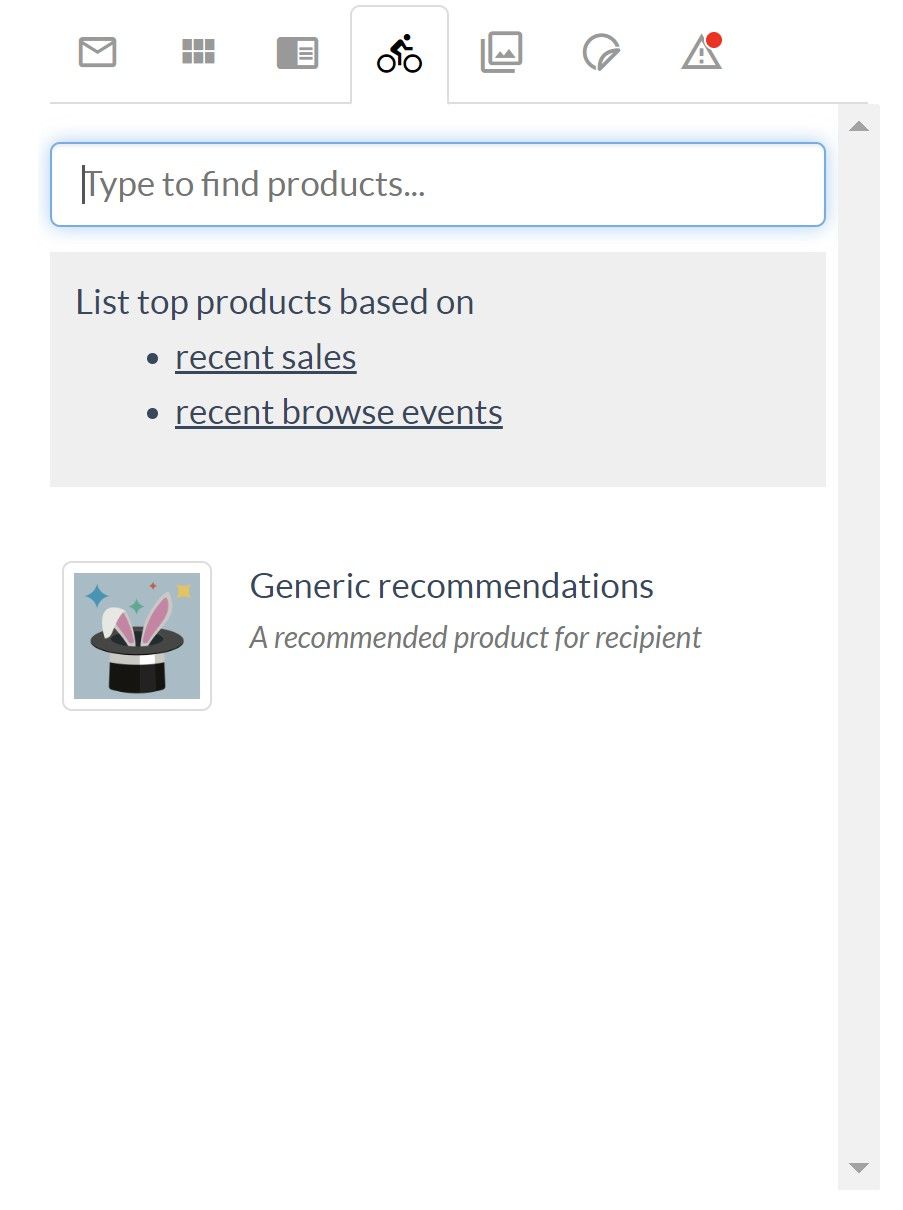
You can use the search bar to manually search for the products from your database,
Or select products from the selection of your most sold and most browsed products in the last week.
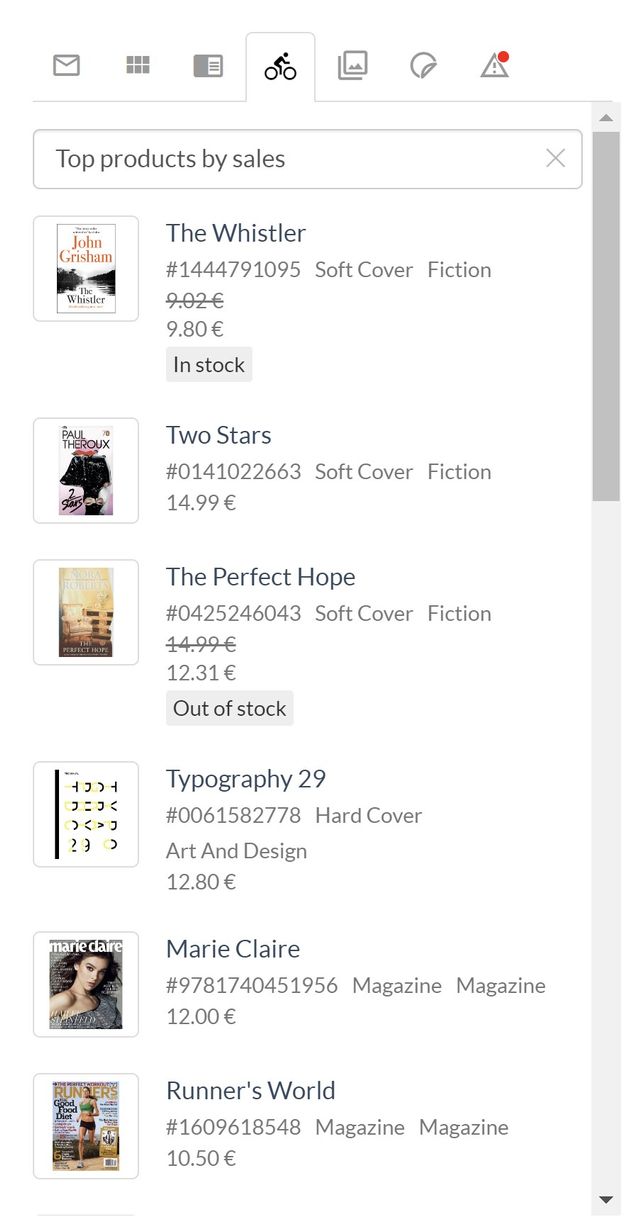
If the feature is enabled, you can also use our product recommendations in your message.
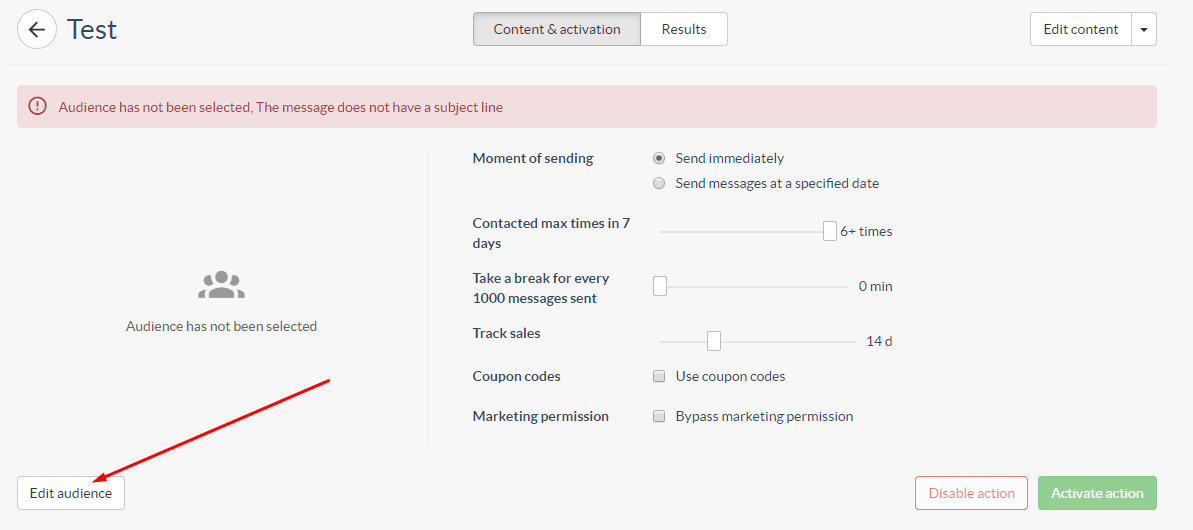
Then to continue onto choosing the audience for this campaign, I click on the Save and exit button in the upper right corner. This will take me to the activation page but in the lower left corner I can choose the audience for this campaign:
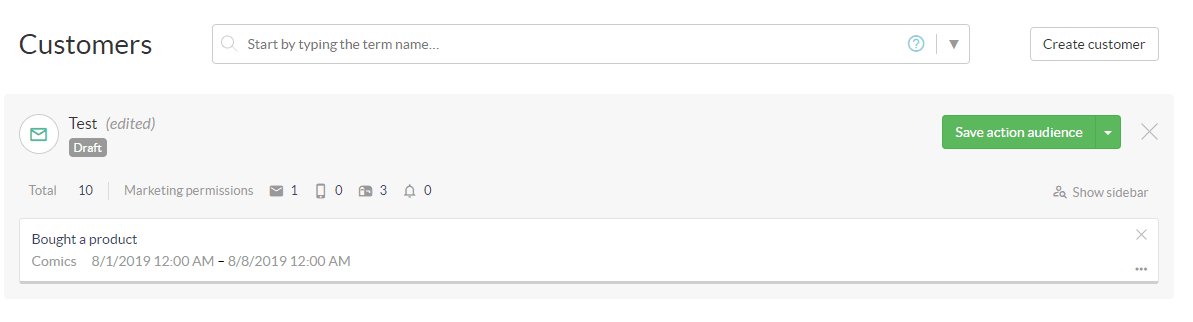
In this campaign I use the bought a product search that is one of the many default searches in Custobar to target customers who has bough the comics category within the last week and click on Save action audience.
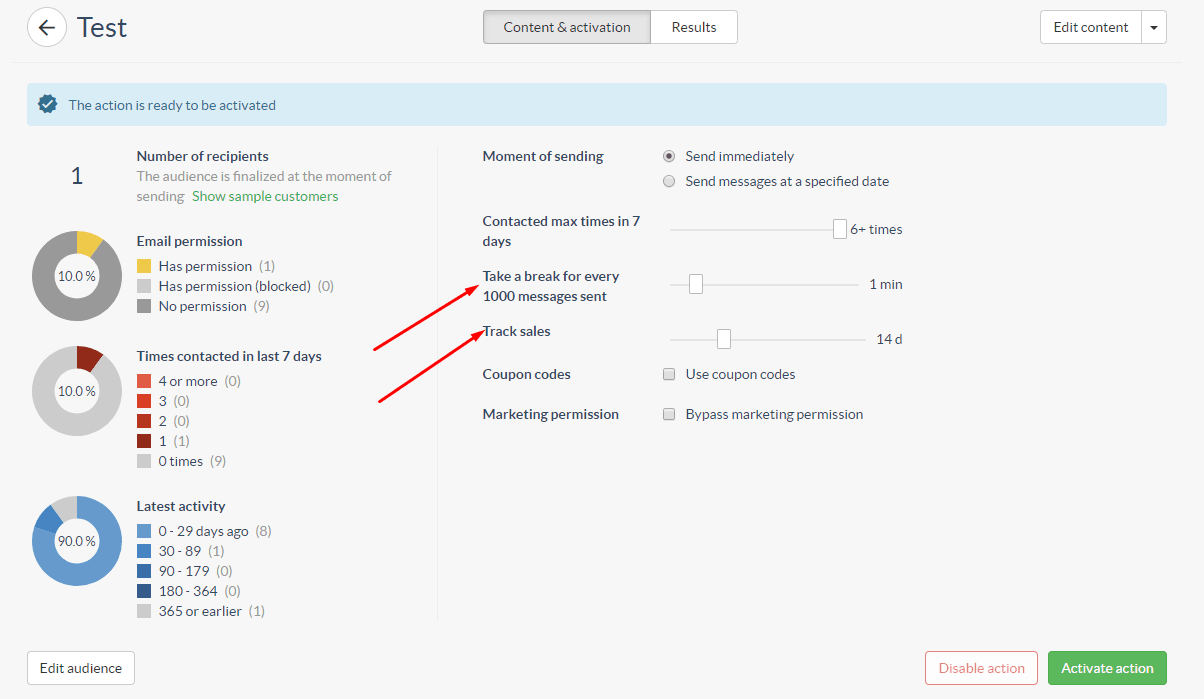
I am now ready to activate my campaign but first I choose how I want to send the action, for example I want to send the action immediately and with a delay of 1 minute between bundles of 1000 emails to not make too much and fast traffic to my online store. When ready, I will save the action which will allow me to activate it. And I will also choose to only track the sales for this specific campaign for 7 days after activating it.
When activated, the Action will fire in a few seconds and customers will start to receive the email. Statistics will be updated real time and you will be able to compare actions with each other. Very easy!